Advanced Ads is the ideal tool for embedding ads from networks like Google AdSense into websites created with the Pagelayer plugin.
In this tutorial, you’ll learn to manually embed these ads into your posts, pages, and theme templates using the Pagelayer widgets. I’ll also show you how to automatically insert ads into your website content using Advanced Ads Placements.
Table of Contents
Using the Advanced Ads widget to integrate ads in Pagelayer
There are different ways to insert ads into your Pagelayer website.
With the Pagelayer page builder, you can easily drag and drop Pagelayer and WordPress widgets to the desired positions in the layout of your posts and pages.
If you want to add ads to your page using the Pagelayer interface, scroll down the widget list to the WordPress section and select the Advanced Ads widget.
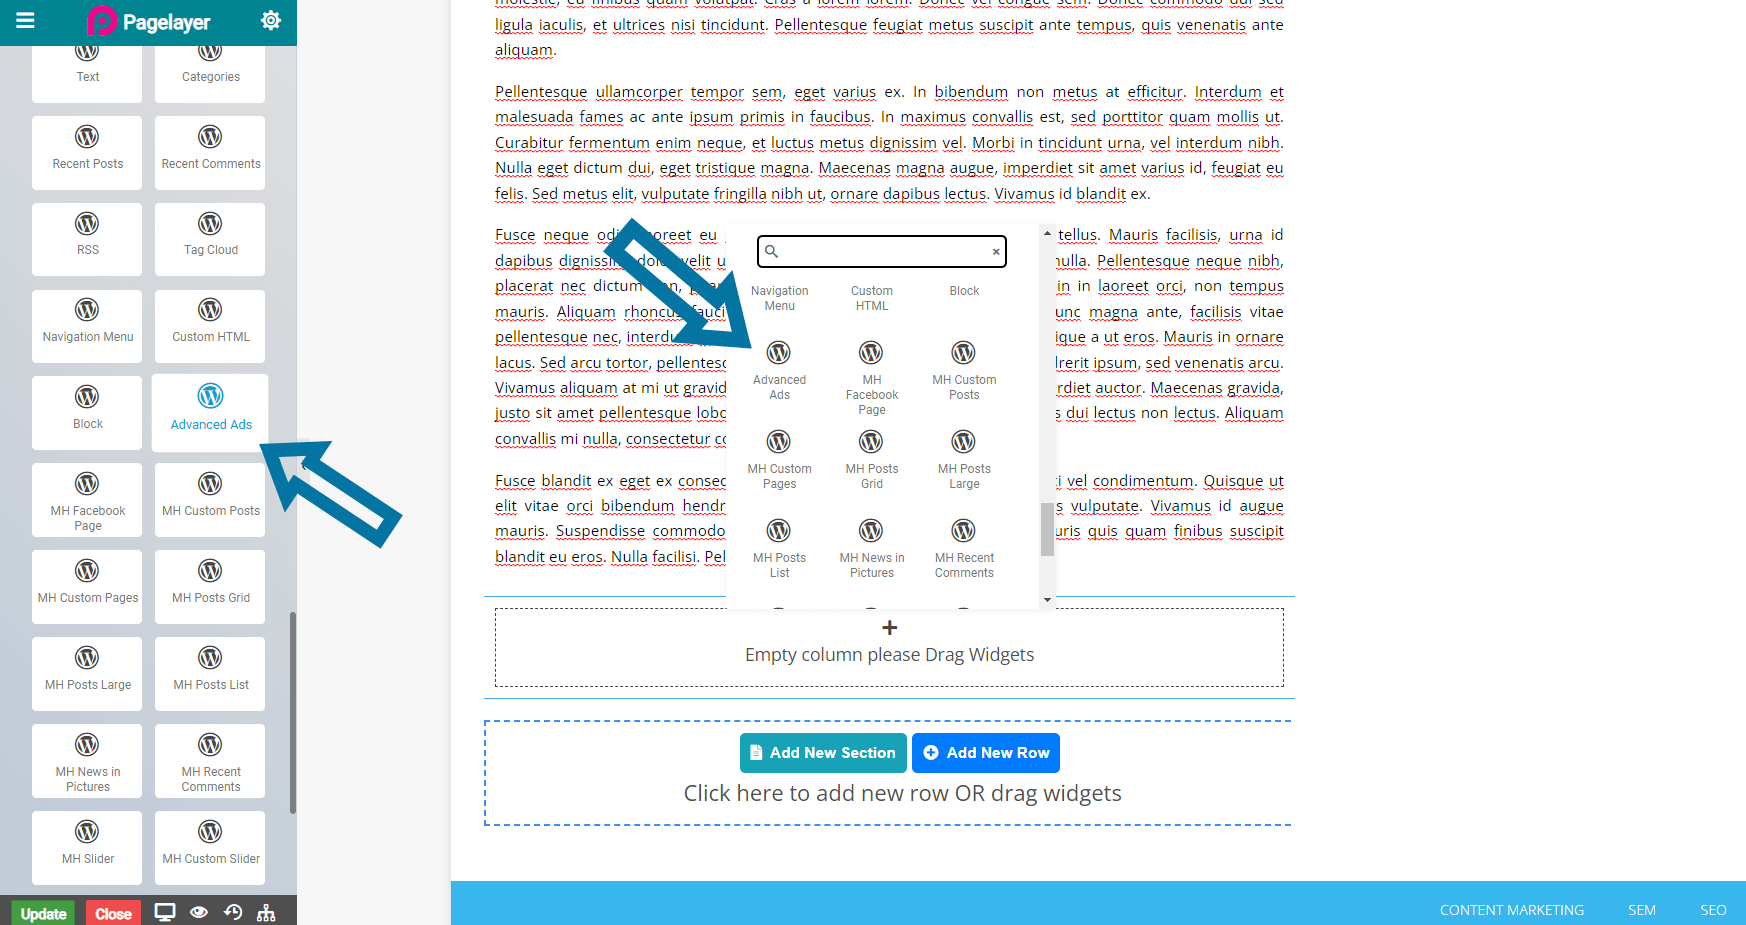
Tip: If you have a lot of widgets, you will get a little faster if you use the search function above.
The widget allows you to select the following items in a dropdown menu:
- Ads
- Ad Groups
- Manual placements
- Placement of sidebar widgets
After selecting an Advanced Ads item, the ad will immediately appear in the Page Builder interface. This behavior gives you an immediate impression of how this ad will later fit into your layout.
Using the Manual Placement
If you edit many subpages with the pagelayer builder and want to use different ads there, manually placed ads can quickly become confusing.
To avoid manually editing pages when you change ad partners or banners, I recommend integrating manual placements or sidebar widget placements instead of manually inserted ads or groups.
You can conveniently manage the entire ad setup from the placements page (Advanced Ads > Placements). There you can then assign ads or ad groups to your placements. Also, with placements, you can use additional features like Lazy Loading or Advanced Ads Pro’s Anti-AdBlocker module.
Auto-inject ads into your Pagelayer website using Advanced Ads Placements
To add these manual placements, you need to edit each of your posts or pages individually. However, Advanced Ads offers additional placements to automatically inject ads in predefined locations on your website.
The seven placements provided by the free Advanced Ads plugin are fully compatible with the Pagelayer builder. Use them to display ads before, in, or after content automatically.

Advanced Ads Pro and add-ons such as Sticky Ads or PopUp and Layer Ads greatly expand the range of available placements.
For example, you can place ads right in the middle of the content, after a random paragraph, before the headline. Or you can use Anchor Ads, Background Ads, or PopUp Ads to make your ads stand out for more attention.
All these premium placements are also compatible with Pagelayer Builder. They are bundled with the All-Access license.

To ensure that Random Paragraph placements work, disable cache busting for them in the placement settings.
Create and layout ads in Pagelayer
With the Pagelayer builder, you can create beautiful landing pages. But you can also use this toolkit to design your ads and save them as templates.
Pagelayer Templates
Templates are mainly used in Pagelayer to create custom footers and headers. But in this tutorial, we’ll look at how we can use them to layout ads.
Navigate to WordPress Dashboard > Pagelayer > Design Templates in your backend and create new templates or edit existing ones.
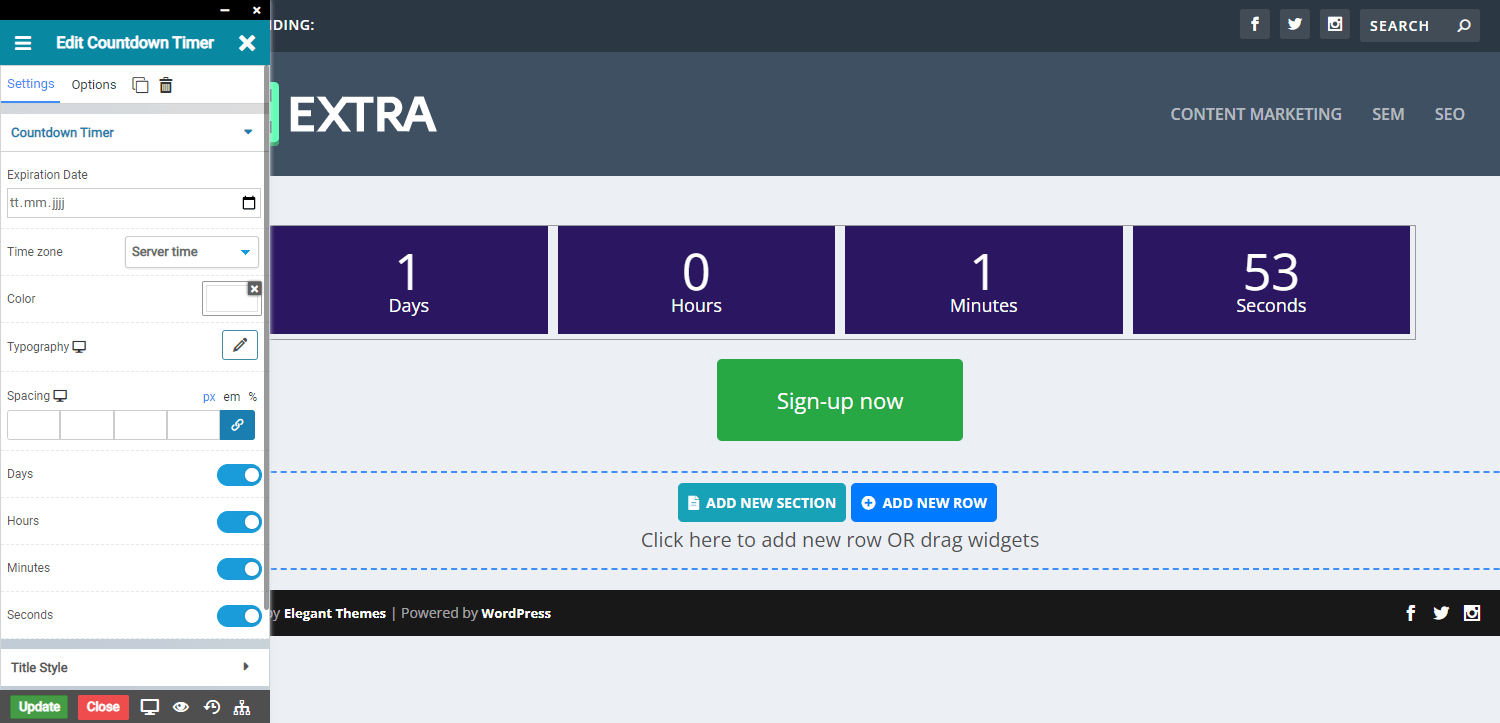
Select the “Section” template type. Add widgets such as buttons, rich text, icons, or countdown timer.
Also, you can design colors, fonts, and borders for your ad unit. With this toolkit, you can create engaging call-to-action elements in just a few minutes.
Then, when you edit a page, you can add these templates as fully predefined blocks. You can find them when you select the Templates widget.
Injecting Templates with Placements
However, injecting with Advanced Ads has many advantages. This way, you can use all the features of Advanced Ads and its add-ons. You can inject this template, e.g., a call-to-action element, on placements using shortcodes.
In any case, you can find these shortcodes on the templates overview page in WordPress Dashboard > Pagelayer > Theme Templates.
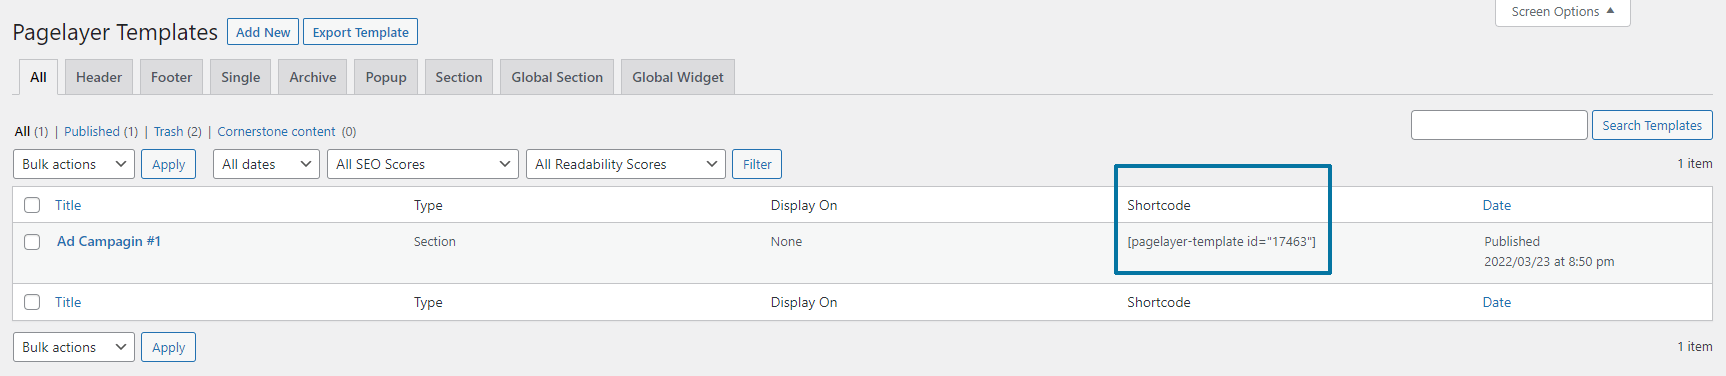
Therefore, copy the shortcode [pagelayer-template id=""] from your Pagelayer template and paste it into a new Advanced Ads ad.
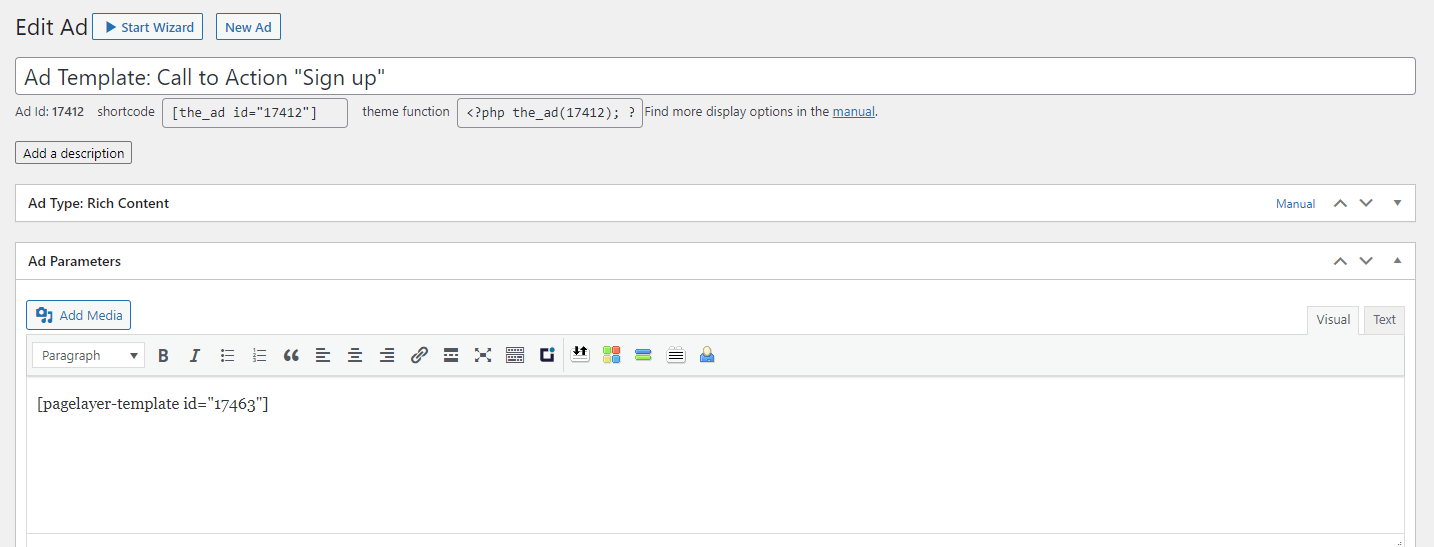
Then you can assign this ad to a placement and automatically inject it into your content. You can optimize ad targeting by adding display and visitor conditions.
If you have the Tracking add-on enabled, you can measure clicks and impressions of your templates. Additionally, you can compare their performance in split tests.
Important: If you add templates with a shortcode and placement, please note that they work only on pages you have already saved with the Pagelayer builder.
Using Pagelayer to animate banner ads
Pagelayer Pro offers a few options for animating widgets. You can apply these animation effects to ads, groups, or placements that you’ve manually inserted using the Advanced Ads widget.
Also, you can add Pagelayer animation effects to your templates that you inject via placement as described above.
Disable the cache busting option in the settings of these placements to make sure that the motion effects work without any problems.

Available animation effects
Under Options > Animation, you can choose from various animation effects and assign them to the Advanced Ads widget and your templates. These include, e.g.: Fade-in, Zoom-in, Bounce-in, Slide-in, Rotate-in, or Wobble.
You can set the animation duration and delay for most animation effects.
To get a better idea of animation effects on banners, check out our Elementor video tutorial. In it, you can see almost the same effects in their use.

Please note that you should use such Pagelayer animations only on those ads where the associated ad network allows it. Google AdSense, for example, prohibits such integration. I would therefore recommend these animations mainly for image ads.
On AMP pages, these animation effects do not work due to the technical limitations of the AMP format. You could specifically hide such ads using the AMP display condition.
Integrating Google AdSense into Pagelayer
Advanced Ads allows you to embed Google AdSense into your website built with Pagelayer effortlessly.
Enabling AdSense Auto ads and embedding ad units
With one click, you can insert Auto Ads and AMP Auto Ads.
Watch the following video and see how you can integrate AdSense Auto ads into your website within one minute.
Of course, you can also define where you want AdSense ads to appear on your website. For this, you have to embed the AdSense ads manually. You can learn how to do that in this tutorial about manually placing AdSense ads.
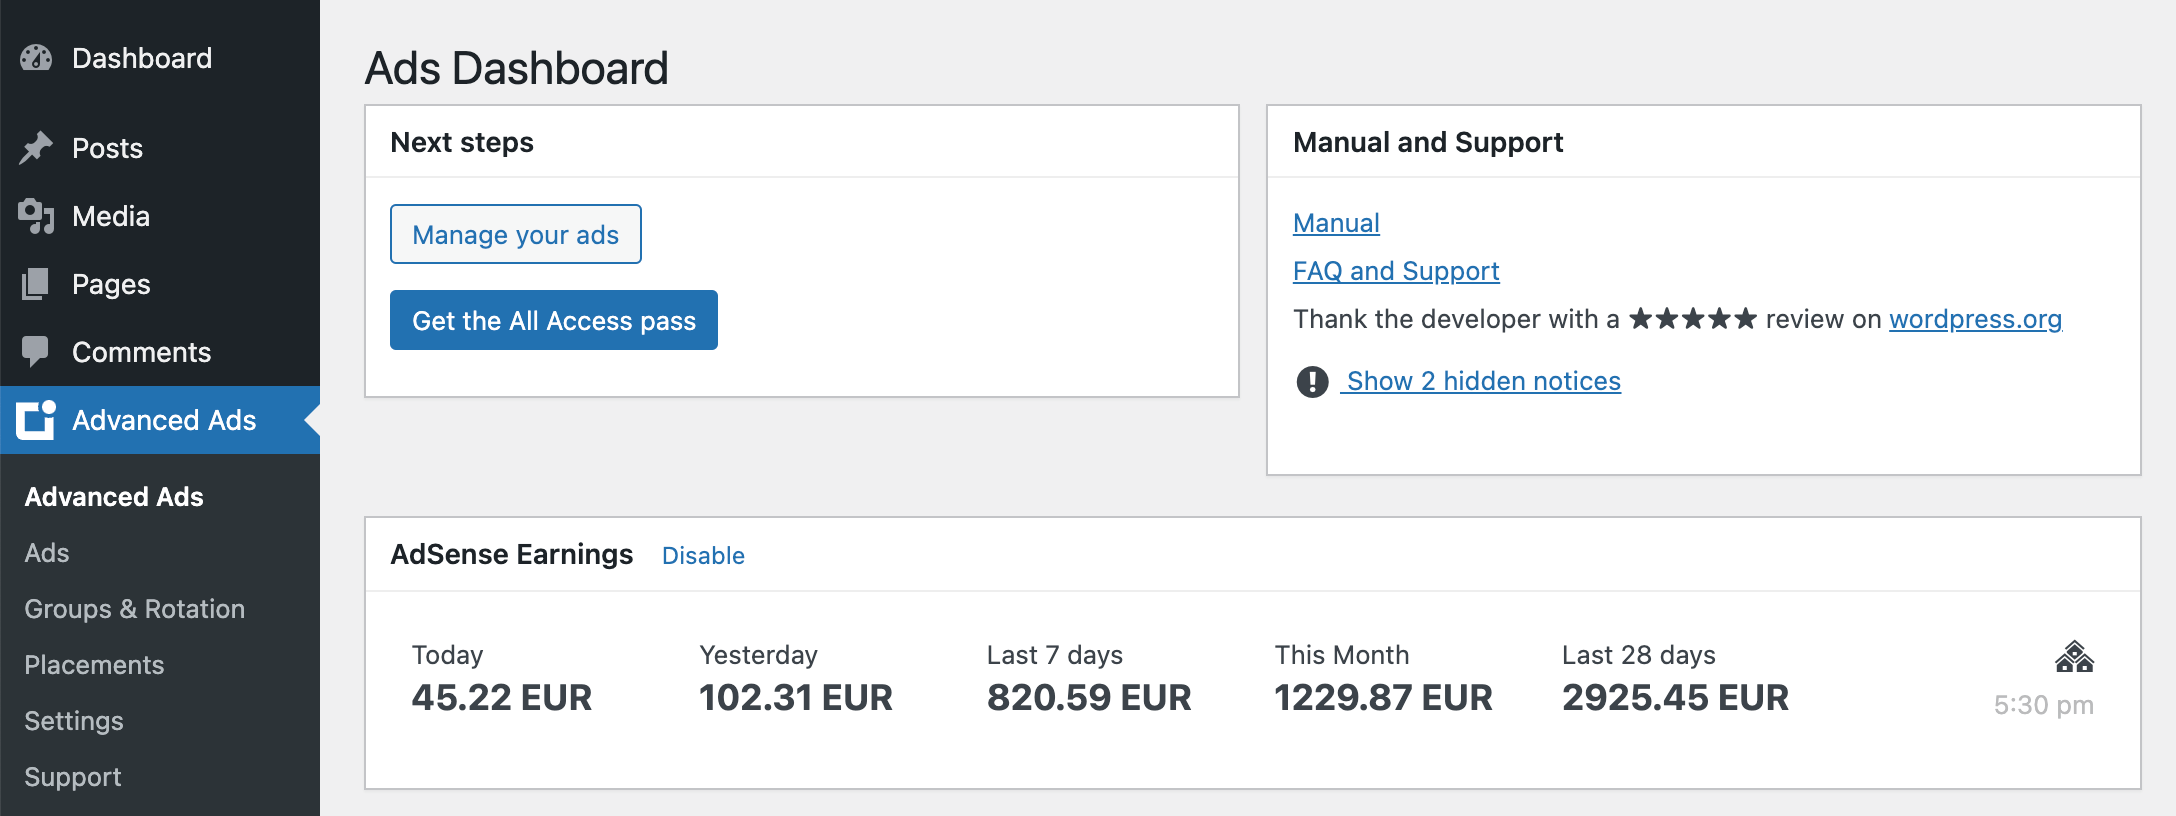
AdSense earnings and notifications in your WordPress backend
The deep integration with Advanced Ads allows you to conveniently import existing ads from your AdSense account and insert them into your website with the placements described above.
Moreover, you can view your earnings reports and notifications from AdSense in the backend. This way it can hardly happen that you miss a warning.
Ads.txt support
Additionally, Advanced Ads can also automatically create an ads.txt file with the required entries of your AdSense account.
Enable the automatic creation of your ads.txt file in Advanced Ads > Settings > General.
If you want to see how easy it works, watch the following video.
Now, you have seen how you can integrate ads from Google AdSense or any other ad network into your Pagelayer website. I wish you good luck with its monetization.
If you have any questions, you can always contact our support team.