The PopUp and Layer Ads add-on documentation offers an overview of its features and functions. You will also find links to additional in-depth articles and tutorials here.
Table of Contents
How to display PopUp ads
After installing and activating the plugin, you find a new placement at Advanced Ads > Placements with the following icon.

Choose this placement and create it like any other placements with the (internal) title and the ad you would like to display.
After you created a PopUp placement, you find a few settings under Advanced options in the placement options (see Placement options below)

Settings
General Settings
Go to Advanced Ads > Settings > General > PopUp and Layer Ads to choose whether to use the Fancybox plugin to display the ads or not.
Fancyboxes are more beautiful and work better, especially on mobile devices, than the default scrip. But it might break if you are already using this script for another purpose on your site. Hence, it is not the default option.
Placement options
When should the ad show up
| Right away | The layer shows up immediately when the page is loaded. |
| When the user stops scrolling | The ad appears when the user stops scrolling |
| After the user scrolled to the second half of the page | When the user stopped scrolling on the second half of the page (half down the possible scrolling distance). |
| After the user scrolled … px | Choose this option to set a custom scroll offset. The offset means the distance from the top of the page. If the page is already loaded with this position, the ad is displayed right away. |
| When the user wants to leave the page | The ad shows up when the user scrolls to the top of the page – mostly to close the page or enter a new address. |
| After … sec | The PopUp appears after a custom period |
Enable background
Enable this option to put an overlay on the content and only display the ad above this. The overlay will disappear when the user closes the ad. So be sure to use the close button together with this option.
Effect
Here, you can choose different effects for the ad to appear. The effect might look different for the default JS or the fancybox method.
You can also select a delay for effects.
Auto Close
If you enable this option, you can set after how many seconds the PopUp will disappear automatically.
Close button
Enable this option to allow visitors to remove an ad with a close button. You can also choose where to display this button (only for non-fancybox).
Enable the timeout so a closed ad is not displayed to the user again within the time frame (in days). Choose “0” to disable the ad only for the current session. In this context, one day does not mean until the next day but 24 hours after the ad is closed.
If you want to specify the timeout more precisely than the 24-hour option allows, we recommend the Max. ad impressions condition (see also Frequency Capping below).
Position
You can choose from 9 positions of the layer, with the screen’s center being the default option.

Other notes
Please confirm with your ad network before integrating their ads as layer ads. Some ad networks (e.g., AdSense) see any positioning of their ads in a PopUp as a violation of their terms of service and might ban you when they become aware of it.
I use those mostly to display banners and popups with my internal ads, affiliate links, or static banners (images).
Try not to use multiple layer placements. Use display or visitor conditions to deliver only one placement to the frontend instead.
Ad groups and conditions in Popup ads
If you do not assign a specific ad to the PopUp placement but an ad group and add any visitor conditions, you must consider that the visitor condition still works on the ad level.
For example, you have a placement with a group containing three ads. You have set using the Max. ad impressions condition that this placement is only shown once in 10 minutes. On the first page view, the plugin counts the impression of the first ad and limits it.
So that two of the three ads can still appear on the second page view. Even with the third page view, one ad from this group would again appear. After the fourth page view, the PopUp would not show up anymore.
Tracking of Popup ads
Some of the above options only display an ad under specific conditions and still load the ad but hide it first. If you have an ad statistic, the impression might even show up.
If you record the impressions with our Tracking Ads add-on, you will find the Delayed ads option in Advanced Ads > Settings > Tracking. Once enabled, the plugin will track ads only after they become visible.
Additional Options
Frequency Capping
Frequency Capping means you don’t show the PopUp to the same visitor on every page view but instead limit the delivery to a certain number of impressions. This option is beneficial for PopUps to avoid confronting users too aggressively with advertising.
To set up frequency capping for your PopUp, add the “Max. ad impressions” visitor condition to the ad unit or the PopUp placement. Now you can determine exactly how often this ad may appear within a definable period.
Custom close button
You may adjust the size of the close button by applying some custom CSS attributes to it. You can find a tutorial on how to do that here.
To add an individual close button to the ad content, just give the clickable element the class PREFIX-close-button.
.PREFIX-close-button{
   transform: scale(1.5);
}
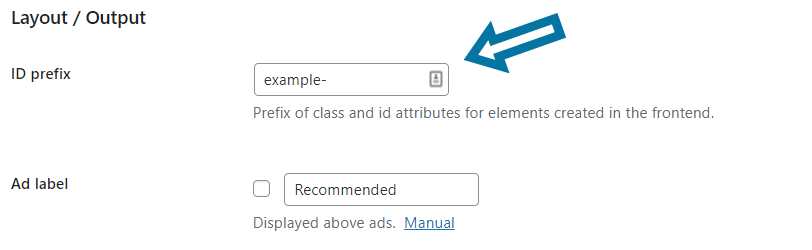
The class attribute might be adjusted depending on the prefix option you set up in the general settings of Advanced Ads. PREFIX- is just the sample prefix and needs to be exchanged with the setting found in the ID prefix option in Advanced Ads > Settings > General > ID prefix.
Please note that the styles added to this class will also be applied to the close button of the Sticky Ads plugin.
Trigger the PopUp ad with a click
Use the following information to open a PopUp with a click in addition to another trigger.
This simple code works best with the basic mode, not with the Fancybox, and if you have only one PopUp configured. Put this code either in the head or footer section of your page, e.g., by putting it into an ad unit with the plain text and code ad type and using the Head placement to inject it into the header.
Replace the string PREFIX with your site’s prefix set in Advanced Ads > Settings > General > ID prefix.
<script>
jQuery(document).ready(function(jQuery) {
     jQuery('.showpopuplink').each(function() {
          jQuery(this).on('click', function(e) {
              e.preventDefault();
              advads_display_effect_show(  jQuery('.PREFIXlayer').attr( 'id' )  ); // replace PREFIX with your site’s prefix
          });
     });
 });
</script>
Then create a link based on the code below.
<a href="#" class="showpopuplink">Show PopUp now</a>
Of course, you need to make sure that the PopUp ad is not visible directly after loading the page. This could be reached, e.g., by setting a long time interval until the ad will be visible (see menu item Show The Ad: you might use “after 1209600 seconds” for example – this would be 14 days).
Remove border and background for Fancybox option
If you use the Fancybox option to display PopUps in combination with transparent ad images, you can apply the following code to your theme’s functions.php to remove the border and background from all PopUps.
add_action( 'wp_head', function() {
?><style>
.fancybox-bg{ display: none; background: none !important; }
#fancybox-outer { background: transparent; }
#fancybox-content { border-color: transparent; }
</style>
<?php
} );
Different sizes of Popup images on mobiles if in group or not
If you are using an image inside a group attached to a popup or sticky placement the size of the image could be smaller on mobile devices compared to the same image which is not delivered by an ad group. You can fix this by adding custom CSS to your popup or sticky placement wrapper.