Displaying ads on your site is also always an interference with the layout. Therefore, you might often have requirements for ad placements that can not be handled automatically with the options in Advanced Ads.
In support, we might then suggest using custom CSS rules. This tutorial explains how you can write those.
This tutorial is no introduction to CSS, the language for styling websites. For basic information, read more on Wikipedia.
Table of Contents
Where can I insert CSS?
You have various options to insert custom CSS.
Use the style.css of your (child) theme
Every theme comes with a style.css file. You can add your custom CSS code there.
However, the following theme update might override it, and other developers and users might also not easily find those changes.
Child themes are slightly better, as an update does not override them, but still not easy to maintain for inexperienced users.
Using theme options
Many professional themes come with an option to insert custom CSS or code into the head section of your website.
You can often find this option within the theme options panel, which is at a different place depending on your theme. Please refer to the manual or ask the theme developer for guidance.
These options don’t get overridden on a theme update but, of course, are only bound to the current theme and don’t apply if you change it.
Using a Plugin
Using a plugin is an excellent theme-independent solution for this task. There are several plugins in the plugin directory for adding custom CSS.
Using the Customizer
You can add custom CSS to your theme from the Customizer (Appearance > Customize > Additional CSS) without the need for additional plugins or directly editing themes or child themes.
There is a tab “Additional CSS” when customizing your current theme to add plain CSS for your changes.

Any CSS changes you make will appear instantly in the preview, just like other changes made in the customizer. This means you can tweak the code without changing anything until you are happy with it.
Keep in mind that the CSS changes are tied in with your theme. This means that if you change to a new theme, your custom CSS styles will no longer be active (of course, if you switch back to your previous theme, they will once again be there).
Using a Header Code placement in Advanced Ads
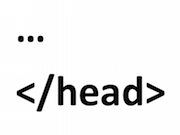
Advanced Ads itself comes with a Header Code placement intended to manage ad tags that you need to load in the head section of the page. However, you can also use it to inject custom CSS rules into your site and preserve them through theme updates.
To create such custom code, create an ad of the Plain Text ad type and wrap the CSS rules in <style>…</style> tags. No other settings for the “ad” are needed.
Now go to Advanced Ads > Placements and create a Header Code placement. Assign the ad there to it, and save the placements to publish it.
For more information, see this tutorial about how to add header and footer scripts with Advanced Ads.
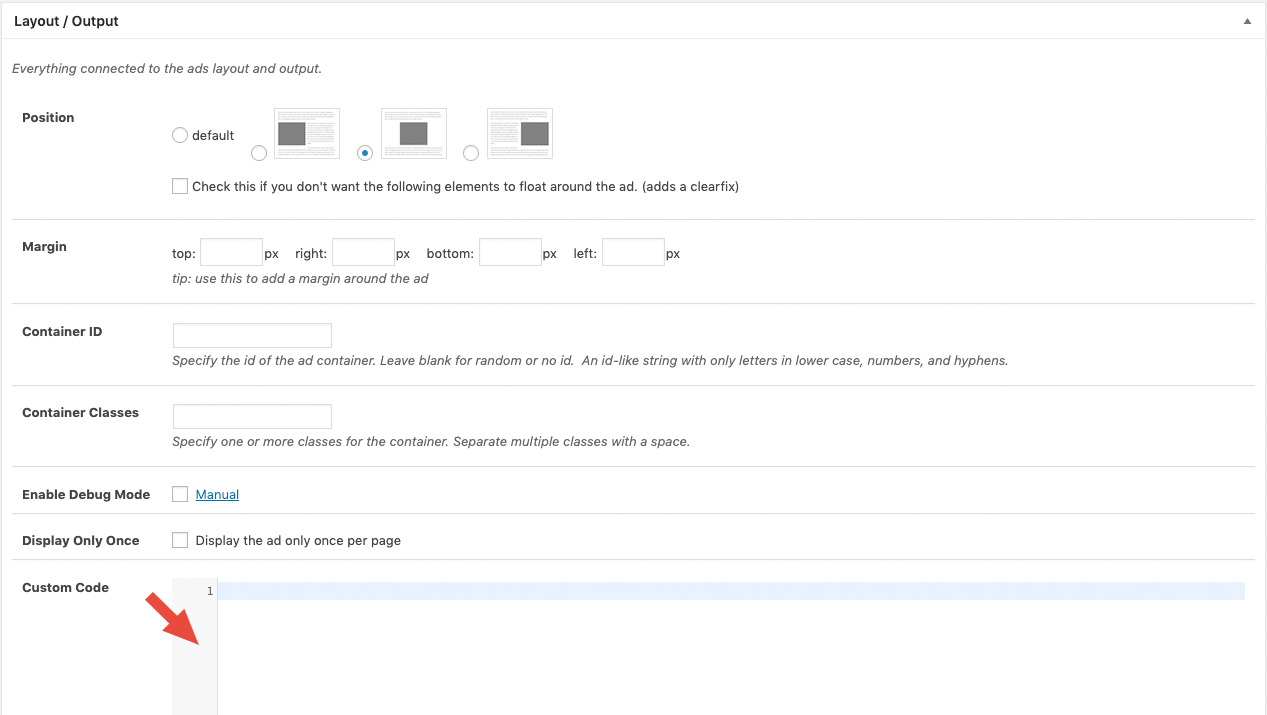
How can I target ads for styling?
CSS is always targeted towards a specific element in the frontend. If you need the ad to have a specific ID or Class parameter, insert them in the appropriate fields in the ad settings or use a placement.
Placements are automatically wrapped with a container that has a class attribute derived from the placement title.
If Advanced Ads Pro is activated, using the custom code feature is even more flexible. See this tutorial to find a detailed description of how to add custom code in CSS and HTML to your ads.