When working with large advertisers or agencies, you sometimes have to deal with third-party tracking tools.
They are provided, for example, by the Google Campaign Manager 360, formerly DoubleClick Campaign Manager (DCM), or by the MDX Open Ad Management Platform by Sizmek. Publishers often receive ad banners and, separately, an Excel sheet with impression and click tag, which they should integrate with the ads on their website.
In this tutorial, I’ll explain the different tags and show you several methods to integrate them into your ad setup.
Table of Contents
Integration of impression tags in Advanced Ads
The idea behind impression tags is to allow external parties, like ad agencies, to count ad impressions on your website. Generally, there are three different tags in these agencies’ spreadsheets:
- Image: Pixel-based version of the Impression Tracker
- Iframe
- JavaScript: The JavaScript-based version of the Impression Tracker
You must always include one of the impression tags along with the banner. In this tutorial, I am going to show you the options you have to include the tags.
I use this sample code for the banner:
<a href="http://targeturl.com"><img src="https://yourdomain.com/wp-content/banner.jpg" width="300" height="250" class="aligncenter" /></a>
As for the tracking pixel, I chose to show you how it works based on the first tag type, the pixel-based Impression Tracking. You can, of course, use the other formats as well. This is my sample 1×1 impression tracker pixel:
<img src="https://ad.doubleclick.net/ddm/trackimp/N5573.227219LAGENZIADIVIAGGI.IT/B23733883.268795497;dc_trk_aid=463411379;dc_trk_cid=129288981;ord=[timestamp];dc_lat=;dc_rdid=;tag_for_child_directed_treatment=;tfua=?" border="0" height="1" width="1" alt="Advertisement">Code language: HTML, XML (xml)Using the Custom Code option
Advanced Ads Pro offers a comfortable way to include additional code with the Custom Code option. This feature is the easiest method to integrate and manage external impression tags.
- Open your ad unit
- Add an impression tag from the clipboard to the Custom Code window in the layout section
- Save and publish the ad
As a result, Advanced Ads now includes this impression tag automatically wherever you inject this ad.
Note: When you inject the impression tag with the Custom Code option and it contains [timestamp] as you can see in the following screenshot, you must insert the timestamp with JavaScript, not PHP. You can find more information about timestamps below.

Adding the impression tag directly to your ad unit
You can also add the impression tag next to the original ad code. This is a good option when you use the Plain text and code or Rich content ad type.
Note: The Rich content editor can remove JavaScript automatically, especially for users without admin rights. So if you want to use any JavaScript, choose the Plain text and code ad type. Choose the image-based impression tracker or the iframe format when using the Rich content ad type.
Using an ad group to display the impression tag together with the ad unit
A third way to integrate impression tags is to create a separate ad that only contains the tracking pixel. Combine this tracking ad with the ad that shows the content in an ad group and make sure to deliver them together.
This method can be used, for example, if you want to add a pixel-code to an image ad that uses the Image ad type.
- Create an ad with the banner that you want to be tracked
- Then create a second ad for tracking and add the impression tag to it
- Add both ads to one group
- Edit the options of this group and make sure that 2 or all ads of the group are always displayed
- Include the group on your website or assign it to a placement
Integration of click tags
Integrating click tags is less complicated than embedding impression tags.
If you chose the image ad type or use the Tracking add-on, paste the click-tracking code you received into the URL field of your ad.
When using the Plain text and code ad type without the Tracking add-on, add the click tag to the ad code.
Managing the timestamp
In over 10 years in the business, I have seen most ad networks and marketing agencies who send out these tags to forget about explaining this part. Sometimes, they might not need it. Other times, they might think that the publisher knows what to do.
So if you see a part in the ad code that might need replacing, then ask them explicitly about whether this is the case and what the requirements are.
I am covering different use cases and solutions in this article. Please consult with the ad code provider if you need further help and let us know if you discover a new solution.
What is [timestamp]?
Some agencies use ad tags that need the publisher to replace part of the code with a current timestamp or a random value. This could help the ad server identify unique impressions and prevent browsers from caching the tracking pixels.
In general, [timestamp] is just an example. I have seen other placeholders like RANDOM or CACHEBUSTER used as well in ad code.
The following code example is intended to add a tracking pixel from a third-party advertiser on your site:
<img width="1" height="1" src="https://adserver.example.com/" />Code language: HTML, XML (xml)Usually, if you load an image, your browser is caching it locally to not be loaded again from the server soon.
Caching is great from a performance standpoint. However, only when the image loads from the server, the ad impression is tracked.
Leaving the code as above would track only a single impression for each visitor instead of tracking all their page views.
To solve this, agencies and ad servers add tracking pixels with additional attributes like [timestamp] in the requested URL. Such a tracking pixel can be as simple as this one:
<img width="1" height="1" src="https://adserver.example.com/cachebuster=[timestamp]"/>Code language: HTML, XML (xml)Replacing [timestamp]
The above example would still cache the image since it contains static values. The solution is to replace [timestamp] with a random value. This tells the browser that it might be a different image and request it from the server again.
The ad networks, agencies, or ad servers we have seen using this technique are:
- Flashtalking
- adform
- Google Ad Manager
- Sizmek
If you are serving the ad code through a third-party ad server, then it might replace the strings automatically. The most significant ad server, Google Ad Manager, does not recognize [timestamp] though, manual adjustment is still needed (see below).
Even though it says “timestamp”, most of the time, the placeholder can be replaced using any unique number. If in doubt, ask the agency that provided you with the tag.
Inserting a timestamp
PHP
You can understand a “timestamp” generally as a string that contains the current time in UTC in seconds. In PHP, you can get the current timestamp by using the time() function. For December 1st, 2020, at 10 am, this would be 1606816800.
Your tracking code might then look like this:
<img width="1" height="1" src="https://adserver.example.com/cachebuster=<?php echo time(); ?>"/>Code language: HTML, XML (xml)If you are using Advanced Ads then make sure to enable the “Allow PHP” option.
If you are using PHP in an ad and have cache-busting in Advanced Ads Pro enabled with the default options, the ad will be loaded using AJAX.
Example
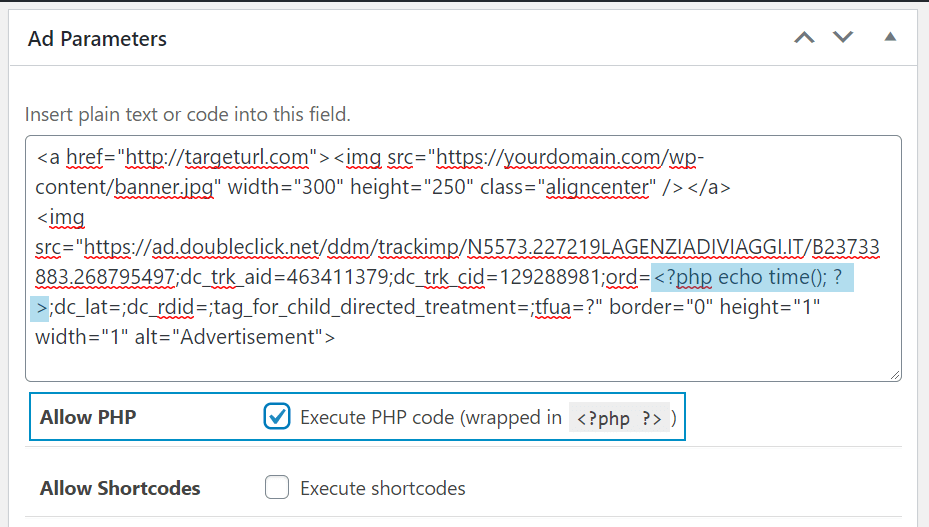
The following example shows an ad code and a third-party impression tag with a timestamp that you need to replace:
<a href="http://targeturl.com"><img src="https://yourdomain.com/wp-content/banner.jpg" width="300" height="250" class="aligncenter" /></a>

<img src="https://ad.doubleclick.net/ddm/trackimp/N5573.227219LAGENZIADIVIAGGI.IT/B23733883.268795497;dc_trk_aid=463411379;dc_trk_cid=129288981;ord=[timestamp];dc_lat=;dc_rdid=;tag_for_child_directed_treatment=;tfua=?" border="0" height="1" width="1" alt="Advertisement">Code language: HTML, XML (xml)
Replace the [timestamp] with the PHP code and don’t forget to enable the checkbox to allow PHP execution for this ad unit.
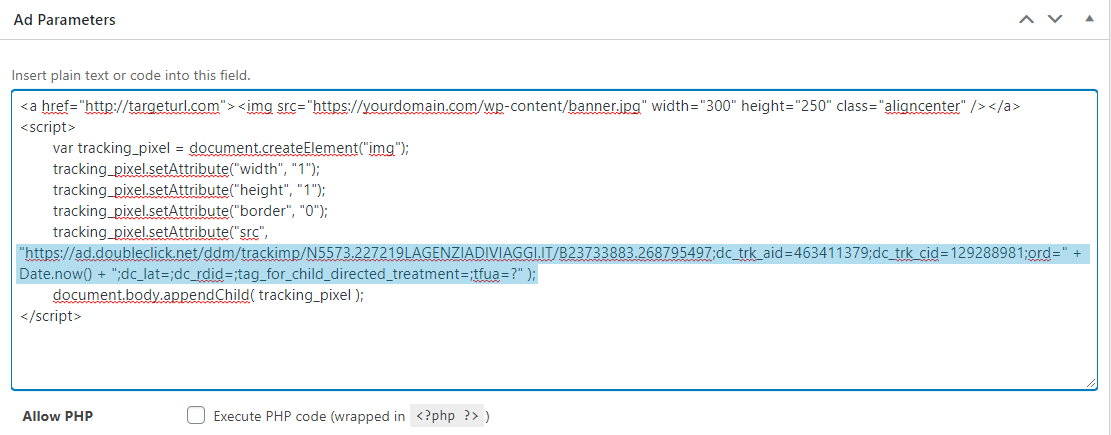
JavaScript
If you need to use the 1×1 impression tracker in the Custom Code field in Advanced Ads or when PHP is not a viable solution, you can create the tracking pixel in JavaScript.
<script>
	var tracking_pixel = document.createElement("img");
	tracking_pixel.setAttribute("width", "1");
	tracking_pixel.setAttribute("height", "1");
	tracking_pixel.setAttribute("src", "https://adserver.example.com/cachebuster=" + Date.now() );
	document.body.appendChild( tracking_pixel );
</script>Code language: HTML, XML (xml)
Example
We use the same ad code as above, but we replace the [timestamp] with customized JavaScript.
Inserting a random value
For a random string, you could use
in PHP <?php rand(); ?>
or in JavaScript Math.floor(Math.random() * Math.floor(100000)) instead of Date.now().
One could argue that these functions might accidentally return the same number for different impressions. While possible, it would need to happen to the same user since we are only trying to fight local caching. I personally don’t consider this worth worrying about.
If you need to generate a truly unique number, then ask your developer for a solution.
Using CACHEBUSTER in Google Ad Manager
If you manage ads using Google Ad Manager, you can add the %%CACHEBUSTER%% macro to your creative code.
Macros are strings that GAM automatically replaces each time the ad server delivers the ad unit. Our example from above would then look like this:
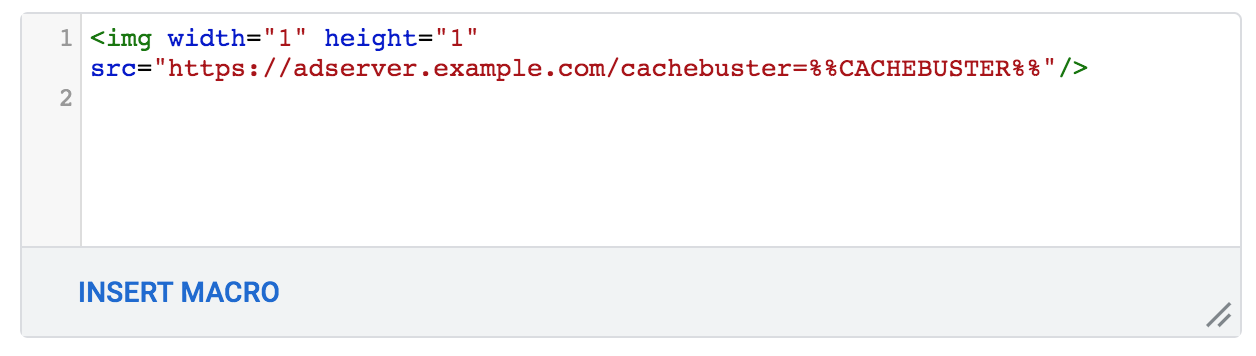
Use our Google Ad Manager Integration to place the ad unit on your site.
Random pixel on AMP pages
The PHP-based solutions work on AMP pages. However, the whole page might get cached in the Google search results, including the random value.
Alternatively, you could use the <amp-pixel> element with the RANDOM parameter like in the AMP manual example.
<amp-pixel src="https://foo.com/pixel?RANDOM" layout="nodisplay"></amp-pixel>Code language: HTML, XML (xml)AMP will automatically replace it.
Talk to your ad agency about replacing the img tag with amp-pixel. You can deliver different ad codes on AMP pages using the “Accelerated Mobile Pages” display condition in Advanced Ads.