When creating or editing an ad unit, you can adjust the ad layout with the ad Layout / Output options.
You can define the position and the margin values and assign existing style settings by specifying a container ID or class.
Advanced Ads Pro offers additional options to insert custom code and display an ad only once per page.
Table of Contents
Layout / Output options
Go to Advanced Ads > Ads and create a new ad or edit an existing ad unit. Scroll down to the Layout / Output options.
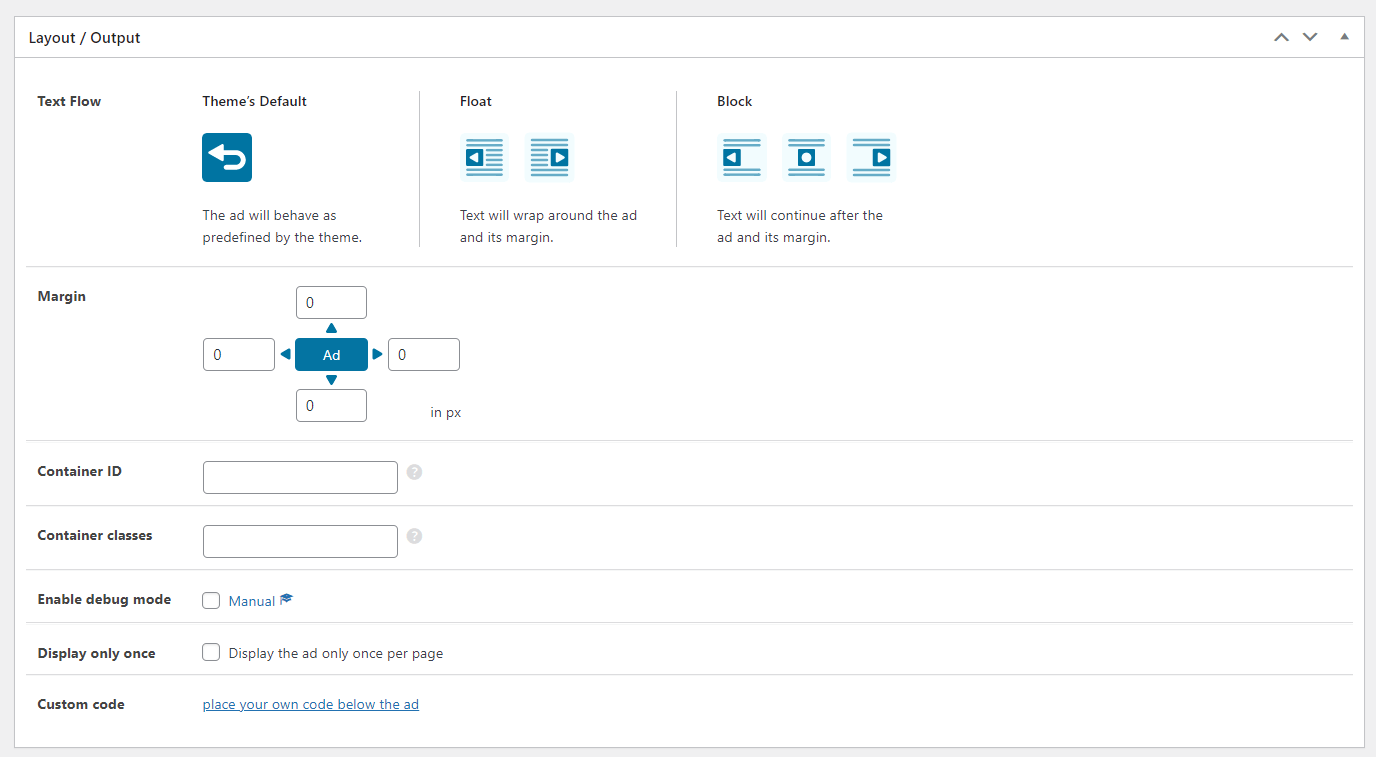
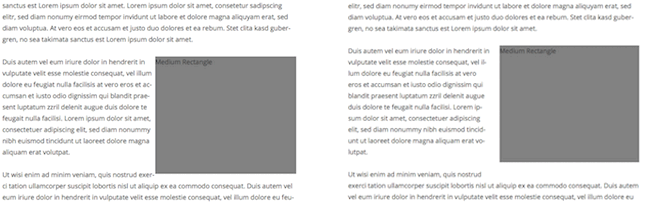
Position
You can align the ad to the left, center, or right inside your layout with the Position option. Use the clearfix option to prevent the following elements from floating around the ad.
Please note: your Ad Label alignment configuration in the Placement options overrides these settings.
Margin
The Margin option allows you to add distance to adjacent elements around the ad unit. This way, you can shape the appearance of your ads inside your layout.
Container ID
Specify the ID of the ad container. Leave blank for random or no id. An id-like string with only lowercase letters, numbers, and hyphens.
Container Classes
Specify one or more classes for the container. You can separate multiple classes with a space.
Advanced Features
With Advanced Ads Pro, you get additional options to customize the appearance and behavior of your ad.
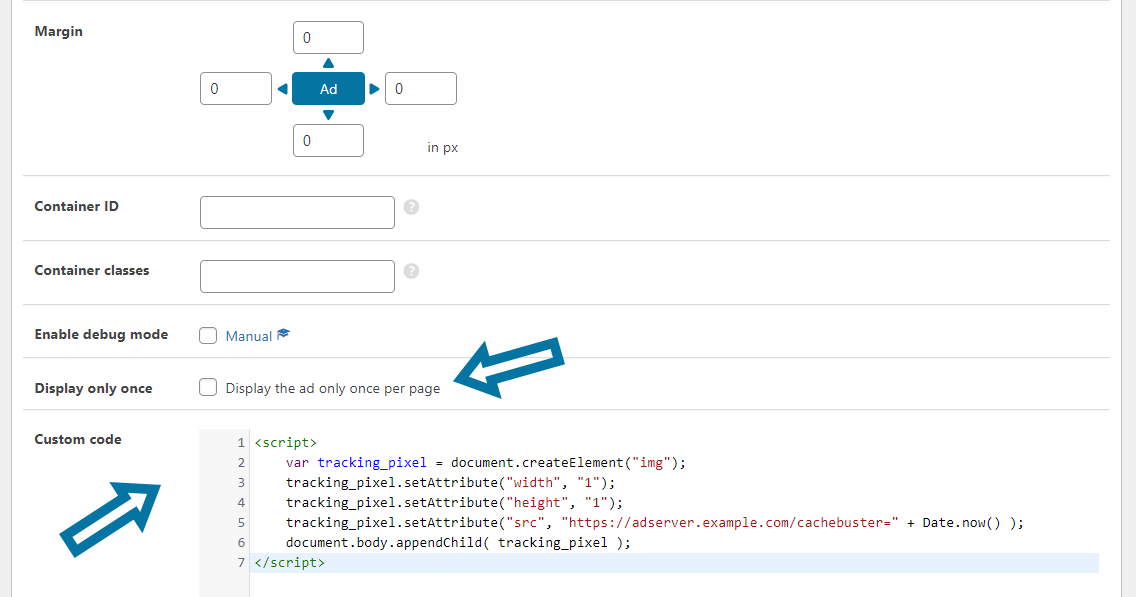
Display only once
This option specifies that the display is shown only once per page. This sounds trivial at first, but it is a handy feature.
A typical use case is when you have added an ad to multiple groups that rotate on different placements. Or also, when you assign a group with various ads to a manual placement, which you insert multiple times via shortcode into the content of the same page.
The goal is the same in both examples: you want to prevent users from seeing the same ad twice. On the one hand, so they don’t get annoyed and banner-blind. On the other hand, to increase the chance that your visitors will click the ads.
By default, the first appearance of the ad in the source code is displayed when this option is checked. In combination with Cache Busting, the order depends on the Cache Busting option used for the ad and placement.
They are checked in the following order:
- ad positions without Cache Busting,
- passive Cache Busting,
- AJAX Cache Busting.
Using rotations and limiting the appearance of ads to only one per page can break loops and cause ads not to show or rotate as intended.
Custom Code
You can customize your ad with additional HTML and CSS. Just insert your custom code into the textbox.
What else you need to know
- The ad code is practically wrapped in an additional block (div ) and inline styles for the features above.
- The clearfix option adds a <br/> tag with inline styles behind the wrapper.
- You don’t need to type
#or.in container ID and container classes fields.