Are you looking for a tool that would let you distribute ads equally over a given period? The Tracking Ads add-on comes with a dedicated solution for your WordPress website. It allows equal time-based ad distribution based on the number of impressions or clicks you want to achieve.
Table of Contents
Reasons for the even distribution of ad impressions or ad clicks
There are different scenarios in which you might want to distribute your ads equally over a given period. They apply mainly to situations when there is a risk of, for example, accidental spurs of traffic, and you need to balance the ad impressions.
Say, an advertiser purchased ad space on your site. You have agreed on a campaign with a daily budget and the CPC model (costs-per-click). Using Advanced Ads, you may easily define a specific amount of clicks that the ad gets in a day. Thus, you will automatically stick to the agreed spending cap.
Let us look at an example:
| Campaign duration | 20 days |
| Average daily ad budget | EUR 100.00 |
| CPC agreed with a client | EUR 0.50 |
In this case, your client’s ad should not receive more than 100 / 0.5 = 200 clicks per day. Thus, the total number of clicks during the 20-day campaign will reach 4000. You may set this as the absolute click limit to ensure that the ads are distributed equally on each of the campaign’s 20 days.
Another use case for spreading impressions over a given period would be a campaign for a new product which advertising behavior you do not yet know. In such a case, the beginning period should focus on learning to see what works best for the optimization of that campaign. If you distribute the agreed ad impressions equally over that initial phase, you avoid the risk that the budget is spent too rapidly, e.g., due to fluctuating traffic. As a result, the more extensive learning period will let you get more analytic data.
Set up an equal spreading of ad impressions or ad clicks
It is important to remember that for the time distribution feature to work, one has to combine two of the ad’s settings:
- the expiry date
- the limitation of impressions or clicks.
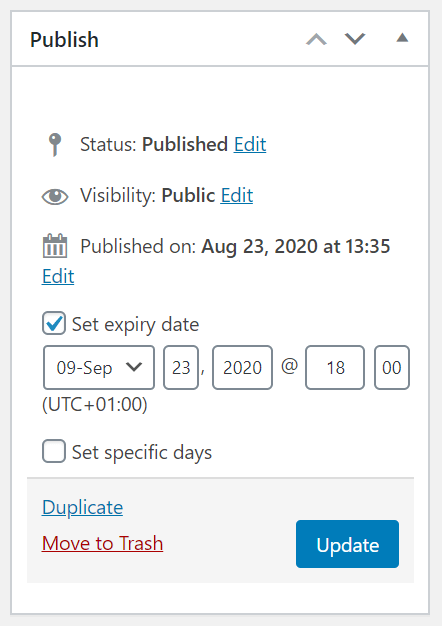
To set an expiry date for an ad, navigate to the Publish meta box of the ad editing window. After setting the date, do not forget to update your ad.
In the second step, scroll down to the Statistics meta box. There you will find the options for limiting your ad. You may either limit the number of impressions or clicks, after which the ad will stop being displayed. Or you may limit both simultaneously.
When you set one of these limits for an ad unit with an expiry date, Advanced Ads will automatically distribute the impressions of this ad over the remaining time.
The plugin does this by dividing the number of impressions/clicks left by the number of hours remaining. The maximum number of impressions/clicks per hour is also displayed below the Limits definition fields.
When the ad reaches the hourly limit, it will not display until the next hour starts.
The limit is recalculated every hour so that unused impressions or clicks have a chance of being distributed as well.
With the following example settings, Advanced Ads would spread the total number of 5000 impressions over 48 hours. And, during each consecutive hour, the number of impressions should not exceed approx. 5000 / 48 = 104,16.
| number of hours until campaign’s expiry date/time | 48 |
| impression limit set | 5000 |
What else you need to know
It is essential to know when the plugin updates the current sum of impressions/clicks. That does not happen with every impression or click. Advanced Ads calculates the sum every hour.
The total number of impressions/clicks may be slightly exceeded or not reached by a small margin. The same applies to the average hourly spread. Finally, it all depends on the amount of traffic, the actual limits that you set, and the interval mentioned above.
You can also use the expiry date in combination with the impression and click limit without spreading them. Just set the constant ADVANCED_ADS_TRACKING_NO_HOURLY_LIMIT in your wp-config.php file.