You can use geo-targeting to display or hide ads for visitors from a specific location, i.e., a country, city, or continent. This feature is available within the “Geo Location” Visitor Condition included in Advanced Ads Pro.
Table of Contents
Enabling Geo-Targeting
The Geo-Targeting feature by Advanced Ads Pro requires the GeoLite2 databases provided by MaxMind. Advanced Ads can connect with MaxMind and download the databases automatically for you. All you need is a free license key from MaxMind.
Download and connect the MaxMind databases automatically
Follow these steps to install Advanced Ads Pro. Generate a license key at MaxMind, and let Advanced Ads download the databases.
- Download and install Advanced Ads Pro
- Enable the license key at Advanced Ads > Settings > Licenses > Advanced Ads Pro
- Sign up as a GeoLite2 user for free at maxmind.com
- Generate a license key in your MaxMind account.
- Select My License Key in the left navigation.
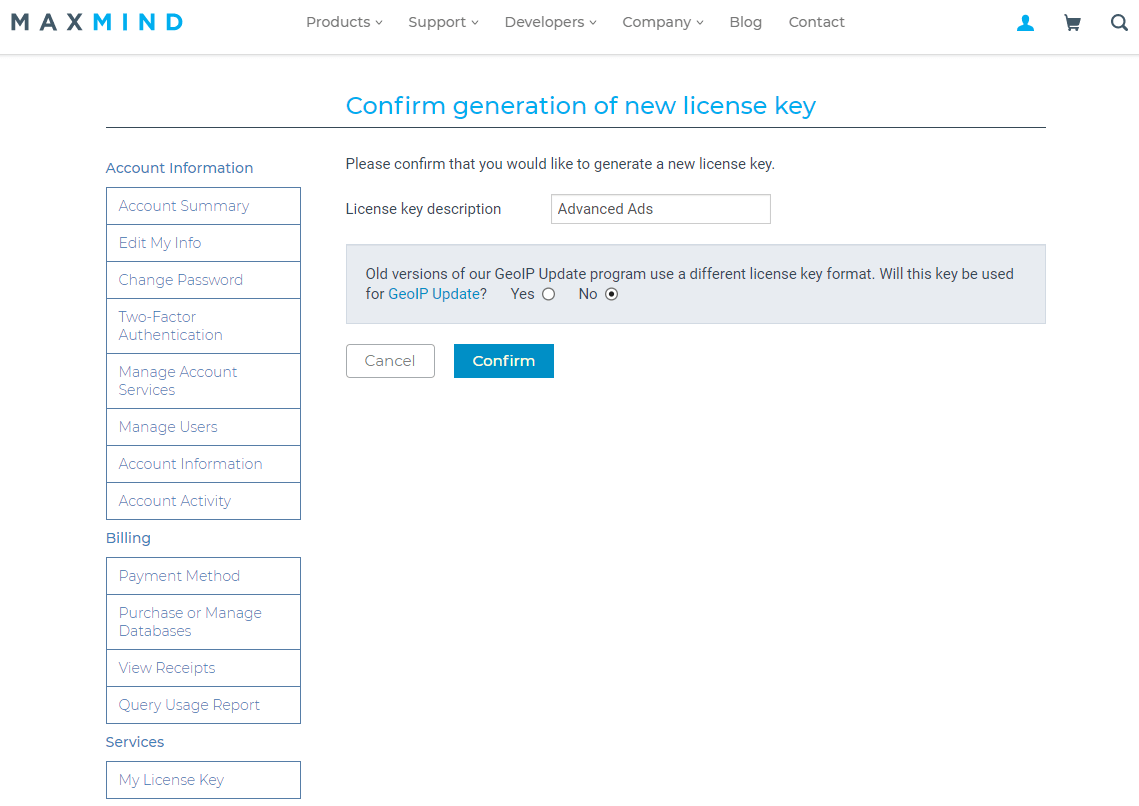
- Click on Generate new license key.
- Give your license key a title.
- Select “No”, when you are asked, “Will this key be used for GeoIP Update?”
Please note: the MaxMind license key will only be visible once, so please save it somewhere for later use. You can generate a new free license key in your MaxMind account anytime.
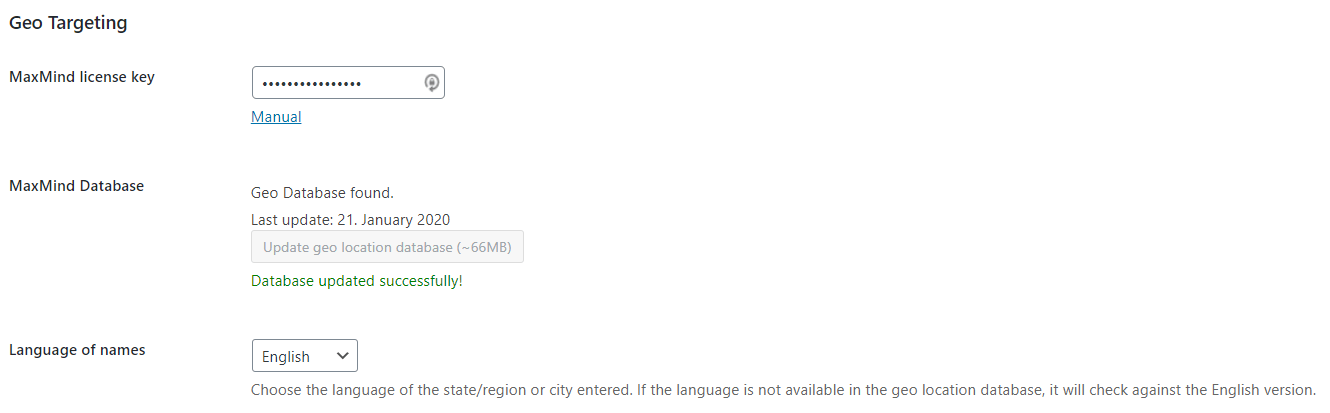
- Copy the generated license key to the field “MaxMind license key” in your Advanced Ads settings at Advanced Ad > Settings > Pro
- Click “Update geo location database (~66MB)” to upload the files and connect with the databases.
- if you get the error message “Database update failed”, please check if the license key is correct or try again later if it is a temporary error by MaxMind.
Advanced Ads will download the database files to the folder wp-content/uploads/advanced-ads-geo on your webhost. You can update the database after each first Tuesday of a month.
Manually upload the MaxMind databases
You can also manually download the MaxMind databases and upload them via FTP in the folder wp-content/uploads/advanced-ads-geo of your WordPress installation.
Follow these steps to upload the GeoLite2 databases manually:
- Sign up as a GeoLite2 user at maxmind.com and generate a license key as described above.
- Download the databases GeoLite2 City and GeoLite2 Country in the binary format from your MaxMind account. They are provided as GZIP files. You don’t need to download the SHA256 files.
- Unpack the GZIP files. Each archive contains a .mmdb file and two .txt files.
- Upload GeoLite2-City.mmdb and GeoLite2-Country.mmdb into the folder wp-content/uploads/advanced-ads-geo via FTP.
- Enter your MaxMind license key into the field “MaxMind license key” in Advanced Ad > Settings > General > Geo-Targeting. Save the settings afterward.
Please make sure to upload both .mmdb files. Advanced Ads will recognize the databases automatically.
When the databases are successfully connected, you will see the confirmation “Geo Database found” at Advanced Ads > Settings > Pro.
Using Geo-Targeting
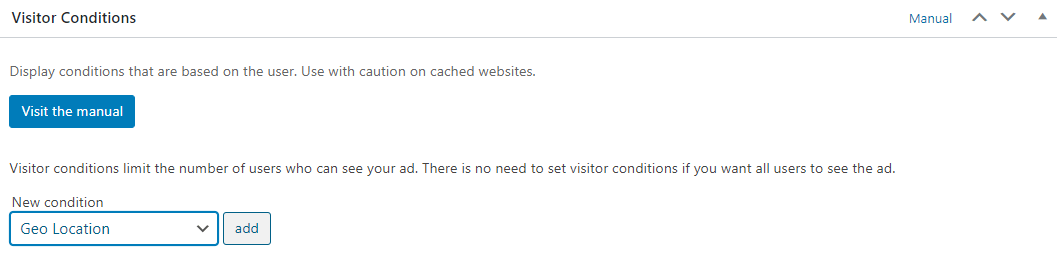
To geo-targeting ads, go to the Visitor Conditions meta box on the ad edit screen and select the geolocation option.
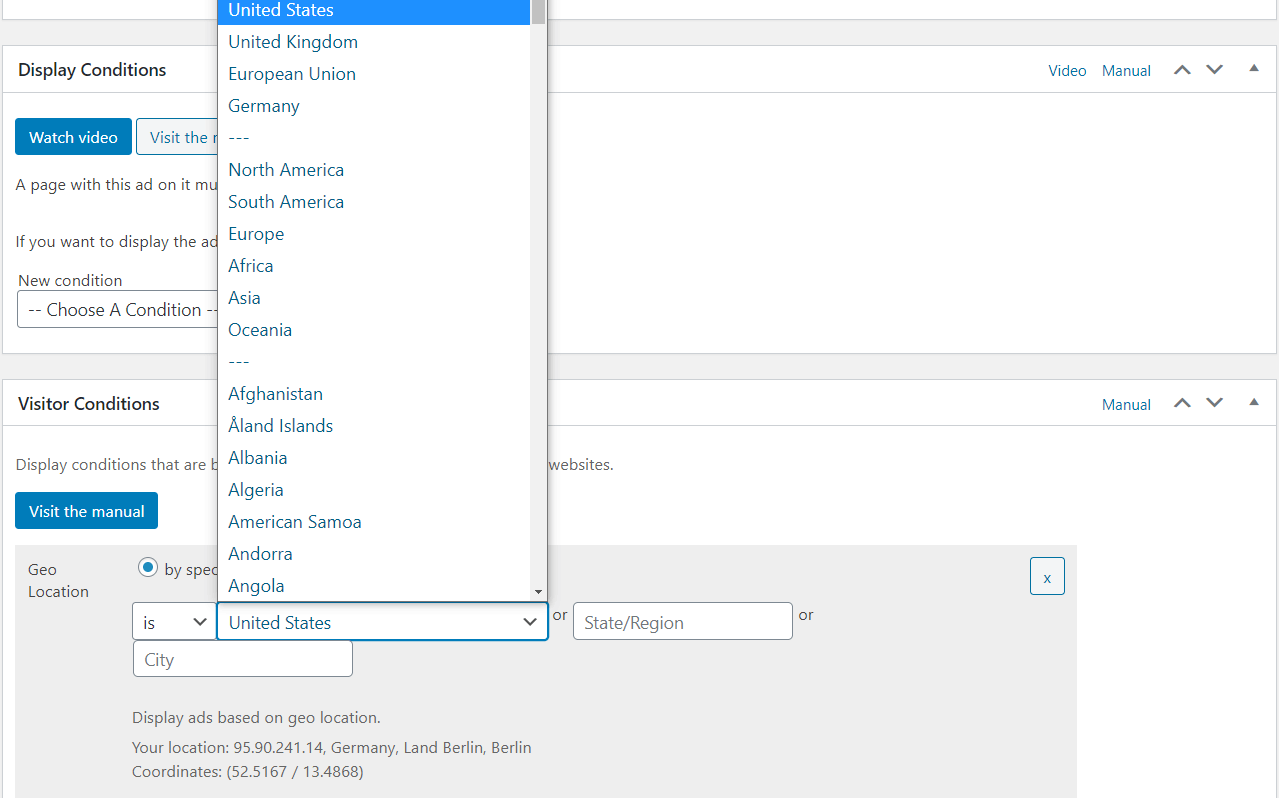
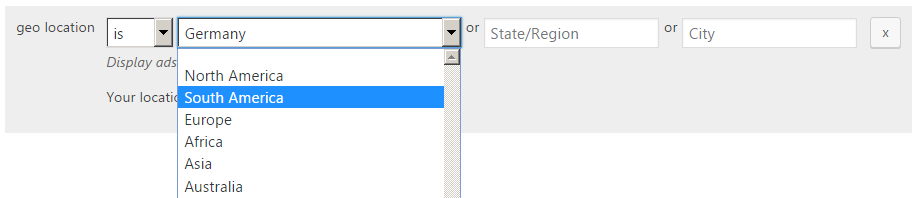
After selecting this condition, you can choose whether the ad should show up or be hidden for the location. Then select the country or continent. Inserting a city is optional.
Display Ads by Country
To display or hide an ad by country, choose it from the second select field of the geolocation options.
The plugin provides a list of all available countries. If you are missing one, then please contact us.
You can find some widespread countries at the top of the list and the rest later. You can also just start typing the name to jump to it.
Leave the field for the city and state empty to target all visitors from that country.

Display Ads by City
To target an ad to a specific city, enter the city’s name into the City field.
You don’t need to select a country or state.

Display Ads by State/Region
The level of a state or region depends on the individual structure of the country you are targeting. To target a state, enter the name into the State/Region field.
You don’t need to select a country. Entering a city name would lead to the region being ignored in the check.

Display Ads by Continent
You find the selection of a continent in the second select field below the most common countries.
There is also a bulk option to select countries from the European Union. This selection is not identical to Europe as a continent.
With the UK leaving the EU in 2021, we removed this country from the EU choice.
Targeting multiple geolocations
You can also target multiple geo locations, e.g., two or more different countries.

To target multiple locations, you just add another visitor condition with the OR connector. There is no limit on areas you can combine with each other.
Using translated state or city names
The geolocation database provides some translations for city and state names. The availability of these translations depends on the country.
To check names in other languages, choose one from Advanced Ads > Settings > Pro > Languages of names.
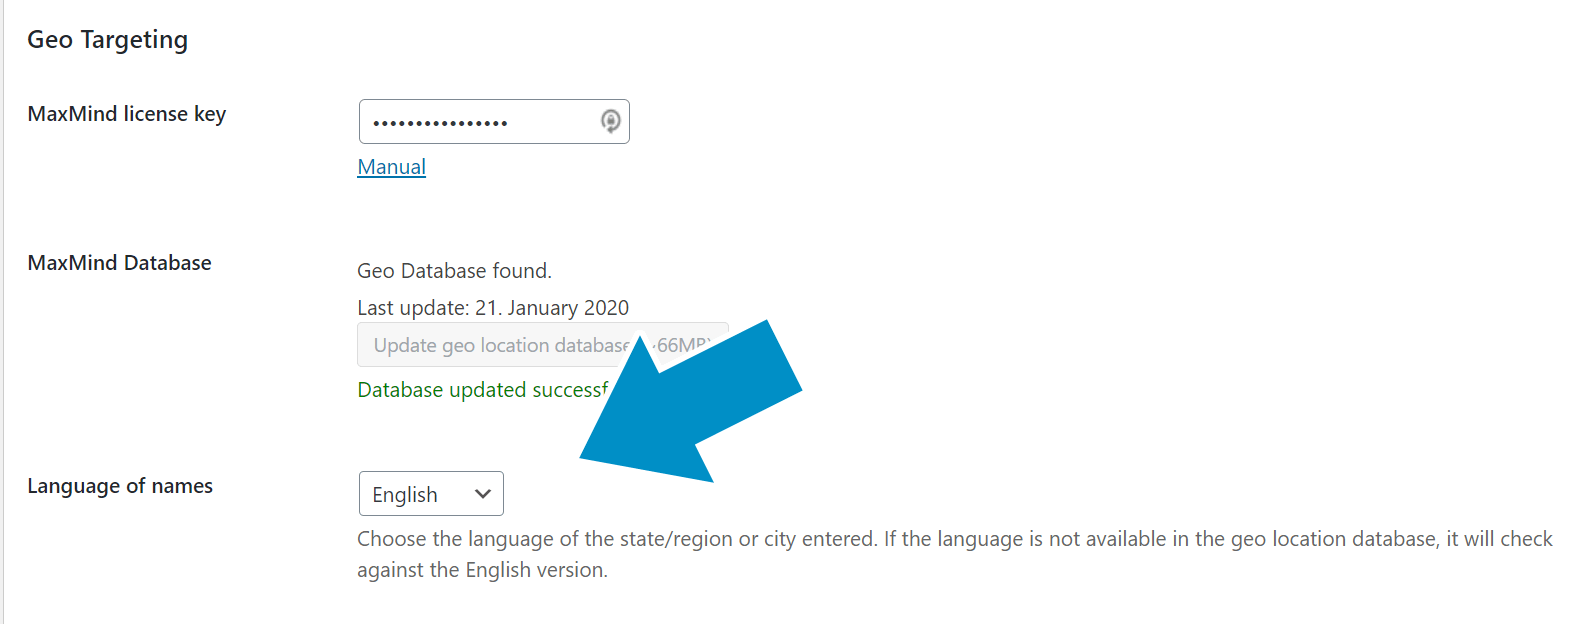
There are up to 8 languages available. If the name you entered is unavailable in the chosen language, it will be checked against the English name.
Targeting locations by radius
Using the radius option, you can target a region or larger area around a specific spot.
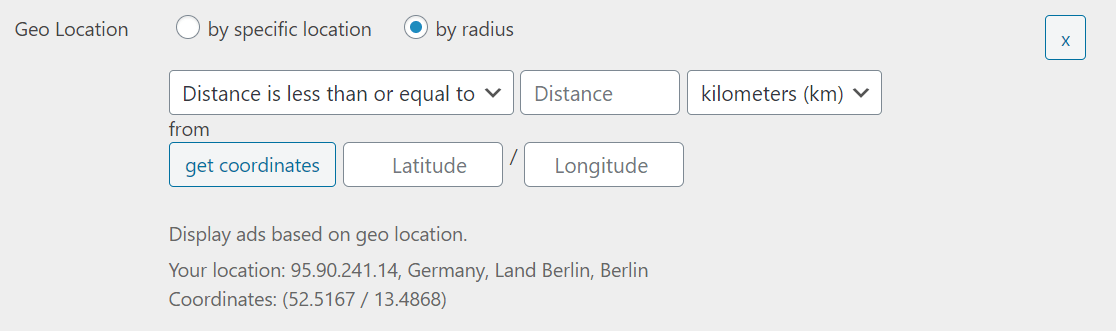
The usage is straightforward. Choose whether to include or exclude the given area, the distance and whether it should be measured in kilometers or miles.
Then get the coordinates by entering a city name and clicking on the appropriate results to load the exact coordinates.
This option is also only as accurate as the underlying database and might still be off.

What else do you need to know
Like with all dynamic ad conditions, an installed and activated cache can negatively influence functionality. Use Cache Busting in Advanced Ads Pro in such cases.
If you are missing more details for your targeted region, please check out the Extending the database section.
The Radius option might not work when your traffic uses a different nameserver, like Sucuri or Cloudflare.
Tests and issues
Inaccurate locations
Please be aware that IPs are continually changing. The more populated the region, the more accurate geo-targeting is working.
Please note that the used GeoLite2 database by MaxMind might miss IPs, especially for small locations and cities. See the upgrade options below.
There is also a list of how accurate the lists are on a city level for each country. See GeoIP2 City Accuracy.
We also noticed that services that route your website traffic through theirs, e.g., CloudFlare, Sucuri, Ezoic, might change the IP address of your visitors. In the case of Sucuri, they remove the more accurate IPv6 from your visitor’s request and only allow us to access IPv4, which is less accurate for some locations.
Caching and geo-targeted ads
Ensure you enable Cache Busting on cached websites under Advanced Ads > Settings > Pro.
If Cache Busting is used, the Geo-Location visitor condition only looks up the location of the visitor ones. This could lead to unexpected behavior when you change the IP address while debugging the option.
To resolve this, you can:
- Use a private window in your browser for each test. Close the window after each tested location.
- Clear the
advanced_ads_pro_visitor_referrercookie after each check. - Disable Cache Busting for the placement (only for testing).
Important changes due to the CCPA
Following the new privacy regulations the California Consumer Privacy Act (CCPA) set, MaxMind has changed the distribution of their free GeoLite2 databases.
Since December 30th, 2019, MaxMind requires the users of their GeoLite2 databases to register for a MaxMind account and obtain a license key. This way, MaxMind can ensure that their service complies with the privacy regulations mandated in the CCPA.
They still offer their GeoLite2 databases free of charge and provide an insightful article about the changes here.
If you have installed the database files before December 30th, 2019, you should already have them on your server. But you should sign up as a new MaxMind user and obtain a free license key to comply with the CCPA.
With the license key, the Advanced Ads Pro can upload the files and connect with the database automatically as described above.
Geo-targeting test ad
The following ad shows your current position according to the geo-targeting database. It lets you estimate how far it might be off for your position.
You can download this ad’s code on this page. Use it in the Plain text and code ad type and enable the Allow PHP option.
Once the database files are uploaded, you can geo-target your ads with the Visitor Conditions meta box on the ad edit screen.
Testing locations
Using a constant
This method is most appropriate when testing on a staging or new website.
You can set the constant ADVANCED_ADS_GEO_TEST_IP in your wp-config.php to simulate that traffic from all visitors on your website comes from a specific IP address.
define( 'ADVANCED_ADS_GEO_TEST_IP', '31.17.16.74' ); // some German IP address
Other resources for testing:
- Online-Test for IP addresses and their location
- Test GeoIP2 database online
- GeoIP2 City Accuracy
Using a VPN
You can use a so-called VPN to your website from a different “location”. Our team prefers using TunnelBear, which has a free plan large enough for testing.
There are also websites offering a VPN without installing anything or having to create an account. If you try them, then please make sure to test more than one service. We have found some of them to deliver unreliable results.