Most WordPress-based websites with an attached store use the free WooCommerce plugin to create and sell products easily.
By default, WooCommerce lists these products on specific store pages and subpages. You can sort and display them with the WooCommerce tools according to certain criteria, such as product category or rating.
Since probably only a part of your visitors navigates to these store pages. Your products remain hidden from the rest and don’t end up in the shopping cart.
In this tutorial, you can learn how to embed your products as WooCommerce banners on other pages of your website. With such WooCommerce ads, you can, for example, draw your blogs’ visitors’ attention to related products, start cross-selling, and increase the number of your sales.
Also, you will see how to integrate ads on WooCommerce pages.
Table of Contents
How to create WooCommerce ads
Using WooCommerce banners, you can highlight specific products or product groups on your website to attract the attention of your visitors.
Of course, you always have the option to layout a banner yourself, e.g., to promote discounts or new collections of a particular WooCommerce category. But for now, let’s focus on the beautiful possibilities that WooCommerce offers to create attractive ads and product grids.
Using shortcodes to create WooCommerce banners
WooCommerce allows the use of very flexible customizable shortcodes. The numerous documented attributes allow the exact selection and grouping of products in product grids.
Set the number of products displayed. You can finetune this selection by age, category, rating, and more. Popular options are bestseller banners, featured items, category banners, or random product selection.
Find a detailed description of customizing the WooCommerce shortcodes, including all available attributes in the official documentation.
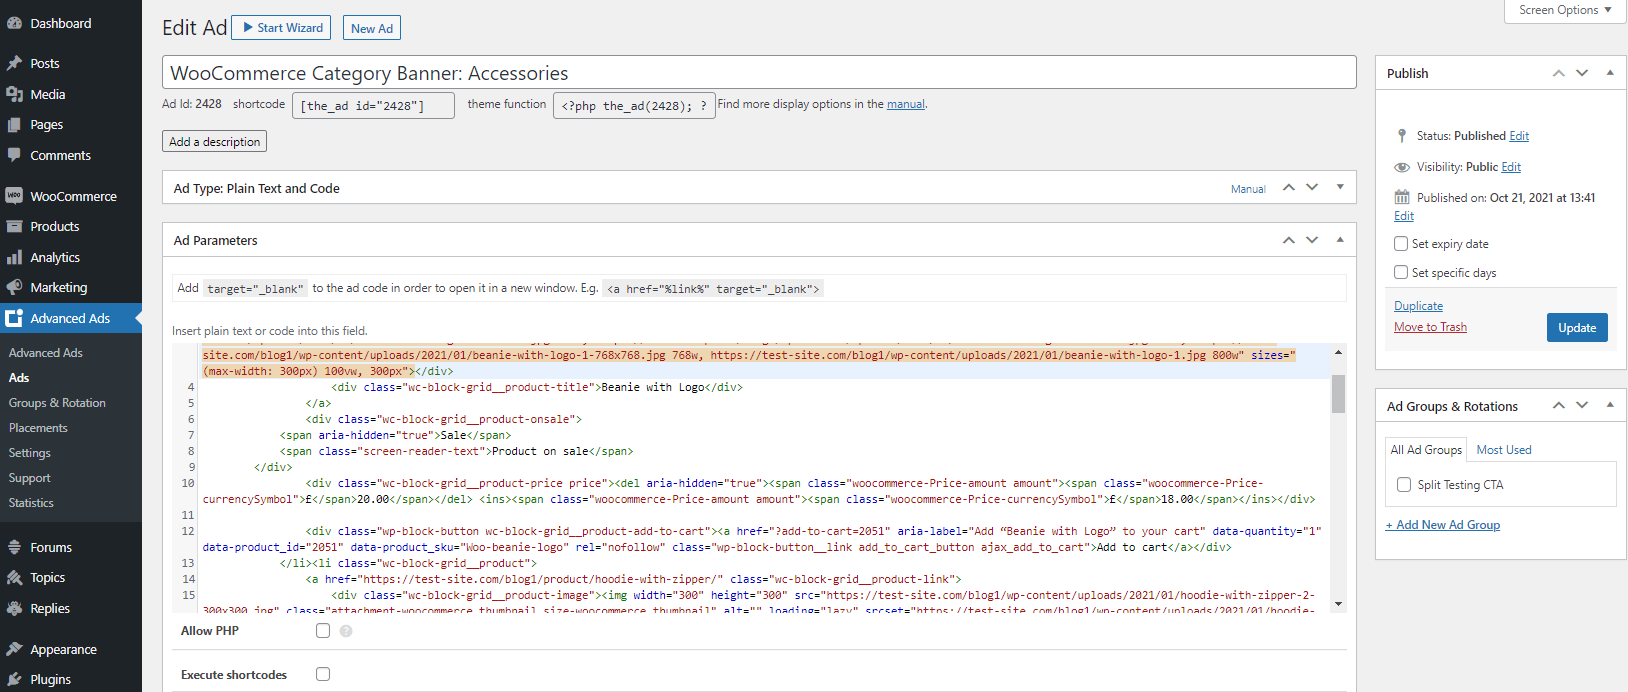
Example: WooCommerce Category Banner
To show WooCommerce products of a specific category on a banner, you need to create a shortcode like this.
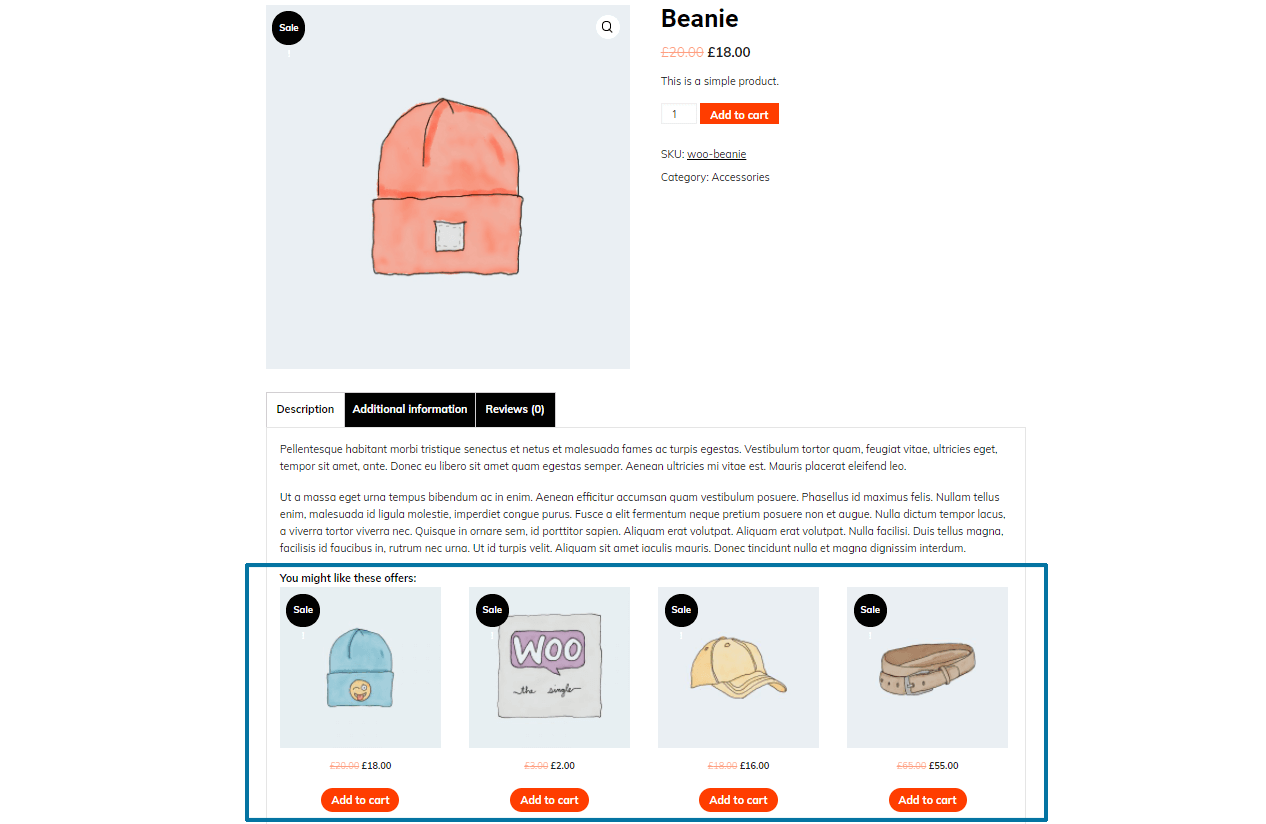
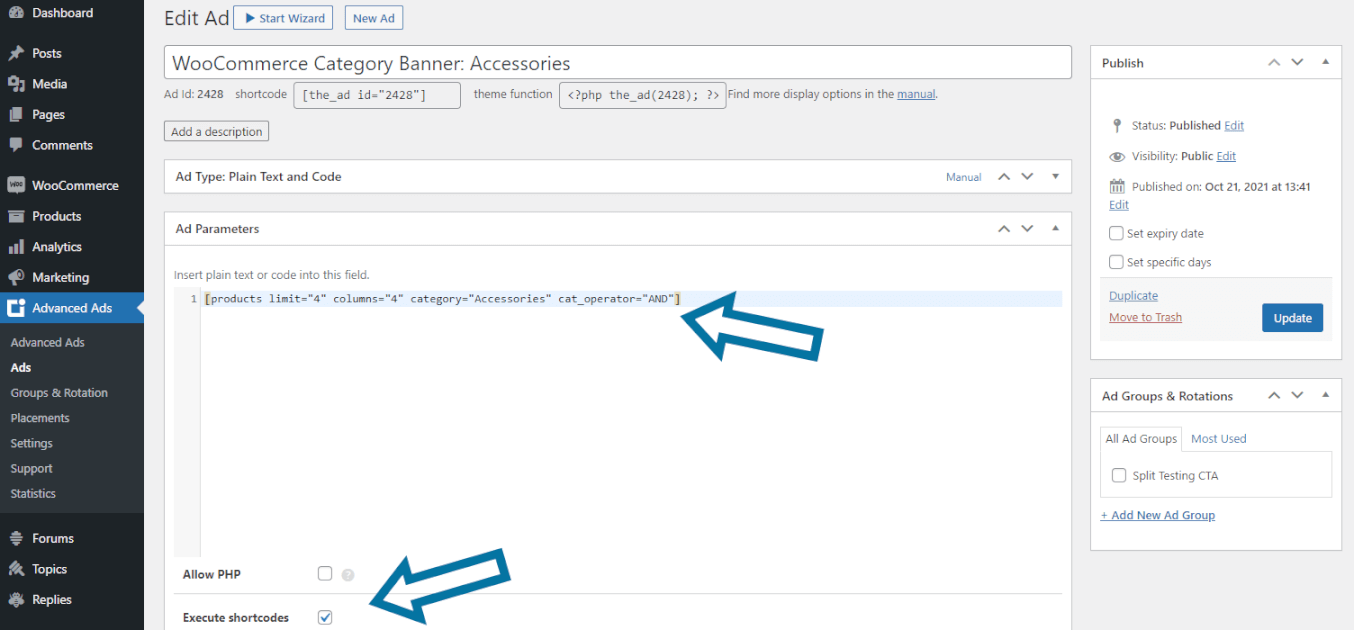
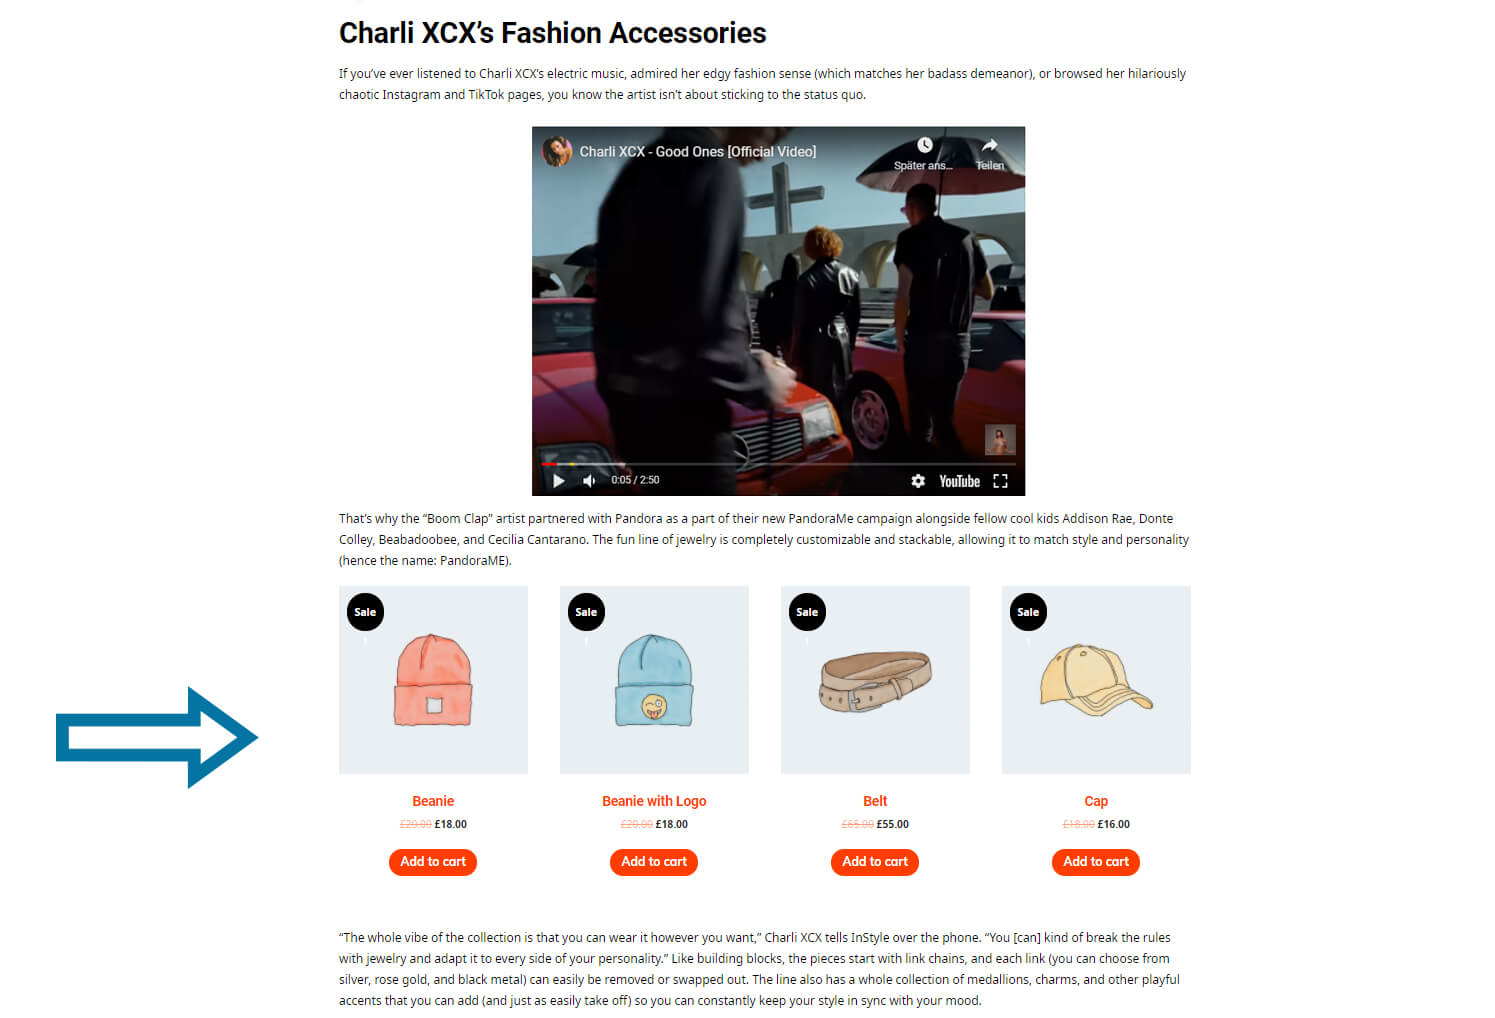
[products limit="4" columns="4" category="Accessories" cat_operator="AND"]Code language: JSON / JSON with Comments (json)For my example, I chose four products from my WooCommerce category, “Accessories”. I am going to integrate them into my blog articles about fashion.
To turn this code into a WooCommerce banner on your website, navigate to Advanced Ads > Ads and create a new ad of the Plain Text and Code ad type. Then copy the shortcode into the Ad Parameters field and adjust the parameters products limit, columns and category.
Make sure to enable the checkbox Execute shortcodes.
The advantage of the shortcode method is the wide range of possibilities when filtering and grouping the products. However, you have to deal with the shortcodes’ customization and work exclusively in the backend.
Therefore, I recommend testing the customized shortcodes in an unpublished test post. Check the frontend result until everything looks as intended.
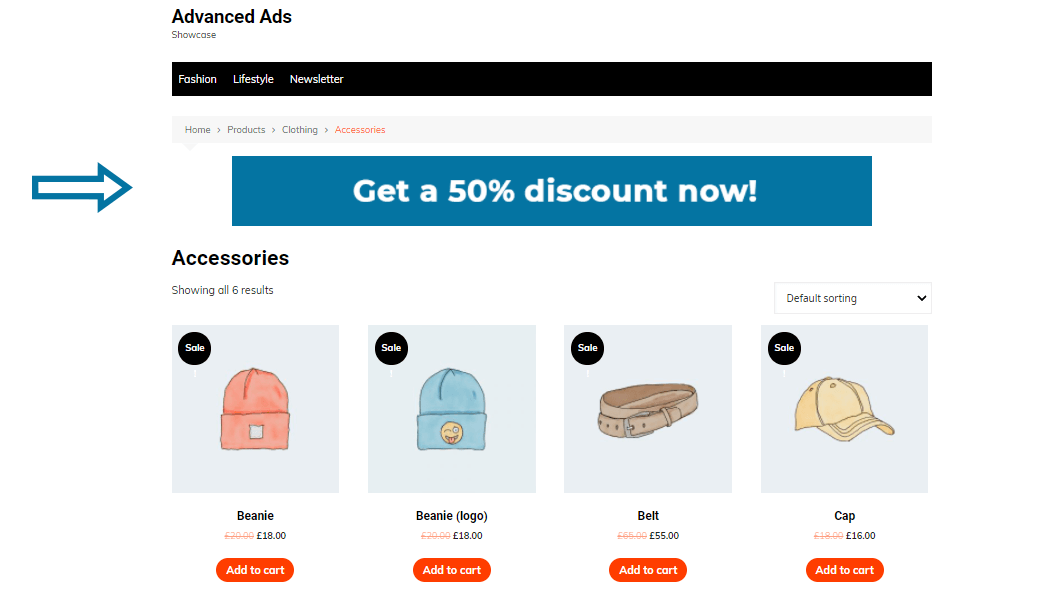
We’ll get to how to add this WooCommerce categories banner to your website in a moment. Before that, let’s first take a look at how this banner looks in the frontend.
Using the block editor to create WooCommerce banners
Instead of shortcodes, you can also use the block editor to create WooCommerce banners.
This method is initially a bit more intuitive than adjusting the shortcodes because you immediately see the result of your settings. However, integrating the ad code is a bit trickier.
To create a new WooCommerce banner, I recommend drafting a new post. If you open the drop-down menu for adding a new block and scroll down a bit, you’ll find a dedicated WooCommerce section with 20 different blocks.
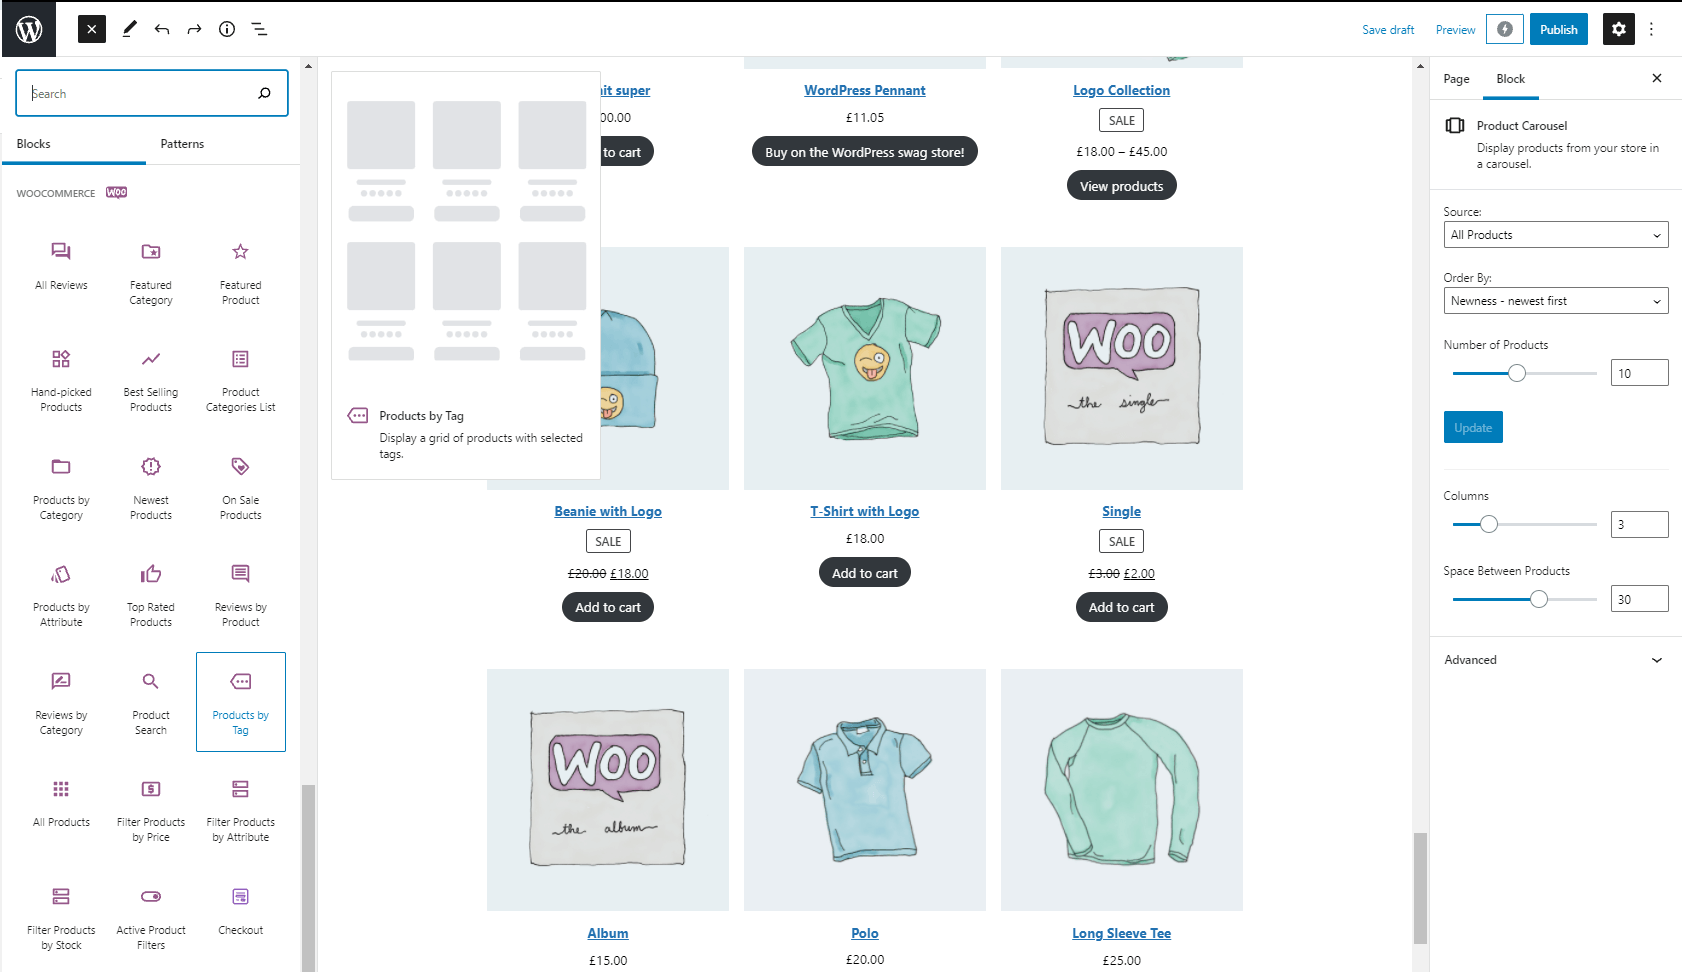
Almost all of these blocks sort your products into a grid. You can customize it with different options like the number of products, categories, and more. Basically, these blocks are a direct transfer of the shortcodes into the UI of the block editor.
Find and copy the code of these blocks
- Check out your test post in the Frontend Preview.
- Open the Browser Inspector and select your WooCommerce block with the cursor.
- Copy this element to the clipboard.
- Navigate to Advanced Ads > Ads and create a new ad.
- Copy the code from the clipboard into the Ad Parameter field.
- Save the ad unit.

This transformation of a WooCommerce block into an Advanced Ads ad unit works with almost all blocks provided in the block editor. Please, keep in mind that the product selection is not done dynamically based on the set parameters but statically based on the copied output in the frontend.
Exceptions are the following blocks:
- All Reviews
- Reviews by Product
- Reviews by Category
- Product Search
If a block is incompatible, Advanced Ads will show you notification under the Ad Parameters field.
In this case, either select another block or use a shortcode to create your WooCommerce banner.
Embedding WooCommerce banner on your website
Now, you can handle this ad unit like all other ad units in Advanced Ads. To embed such a WooCommerce banner automatically into the posts and pages of your website, I recommend using placements. Add display conditions like “category” or “tag” to tailor these WooCommerce ads to your content and to improve their click-through rates.
Adding banners to WooCommerce shop pages
There are various use cases to integrate ads into WooCommerce store pages. For example, you can show the WooCommerce banners described above to encourage customers to buy more products via this cross-selling.
But of course, you can also insert other banners to draw attention to discounts, coupons, gift cards, and more.
Using Advanced Ads as a WooCommerce banner management plugin to embed theme-relevant affiliate banners on dedicated WooCommerce pages can be profitable. But I would advise against integrating click-paid ads like Google AdSense on those pages. Because, after all, you don’t want to redirect your traffic to a competitor’s site. Instead, you want to keep the higher affiliate commission or the potential margin of your product for yourself.

WooCommerce Page types
WooCommerce creates four different product-specific page types on your website:
- the general shop page (shows all products)
- product category pages (show all products of a specific product category)
- product tag pages (display all products of a particular product tag)
- single product pages (display single product pages with a description)
WordPress treats the first three of these like archive pages and the single product page like a page.
Embedding and targeting ads on WooCommerce archive pages
I recommended using the Post Lists Placement or the Custom Position Placement to insert ads into WooCommerce archive pages, e.g., a specific product category page or the general shop page. Both placements are coming with Advanced Ads Pro.
To insert your ads on these pages but not directly in the product grids, choosing the Custom Position Placement would be best. Use the Frontend Picker to determine the position you want.

In the following example, I insert a banner below the breadcrumbs under the top menu. For this placement, I use the selector main#main > div.cm_woocommerce_pages > div.breadcrumb.
Since the single product pages also contain the breadcrumbs, this banner would also appear there.
To prevent this behavior and for better ad targeting, add display conditions to the ad or the entire placement, e.g.:
- Archive: Product categories (to show/hide ads on specific category pages)
- Archive: Product tags (to show/hide ads on tag pages)
- Archive: Product shipping class (to show/hide ads on shipping zones pages)

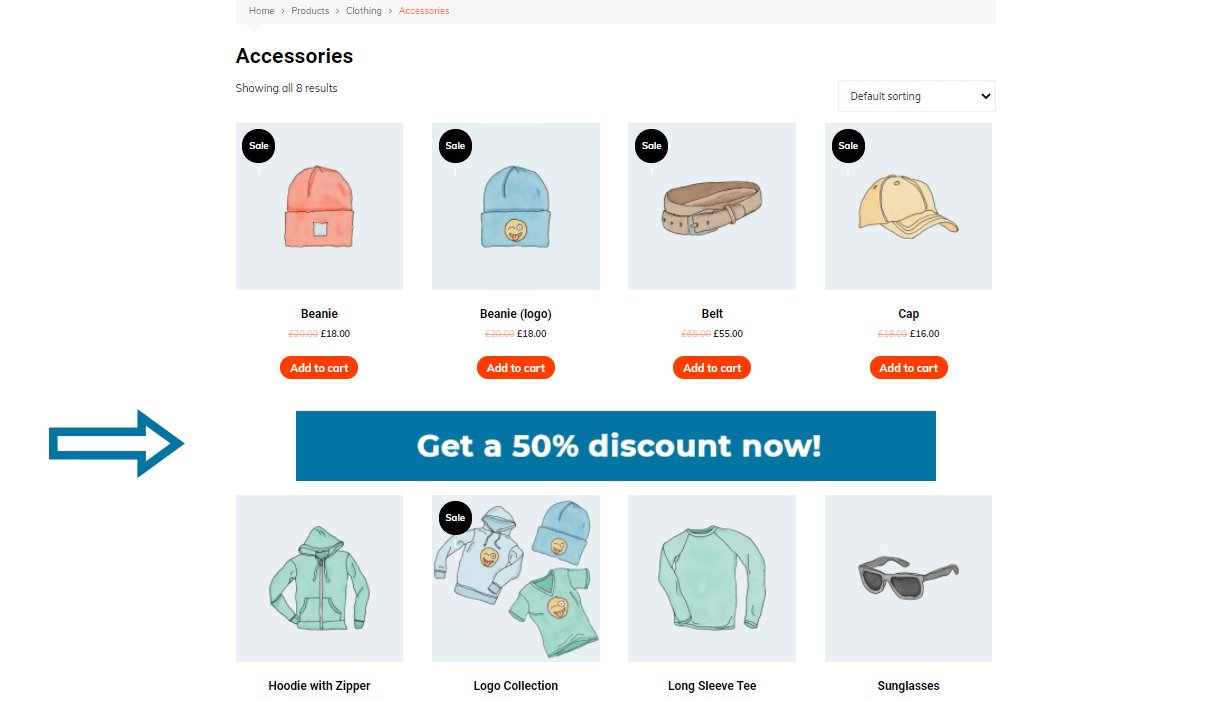
As mentioned, WordPress treats pages like WooCommerce category pages as archive pages. Therefore, to insert ads between the products of a product grid, the Post Lists Placement is a good choice.
In the following example, I insert a banner with this placement before the 5th product.
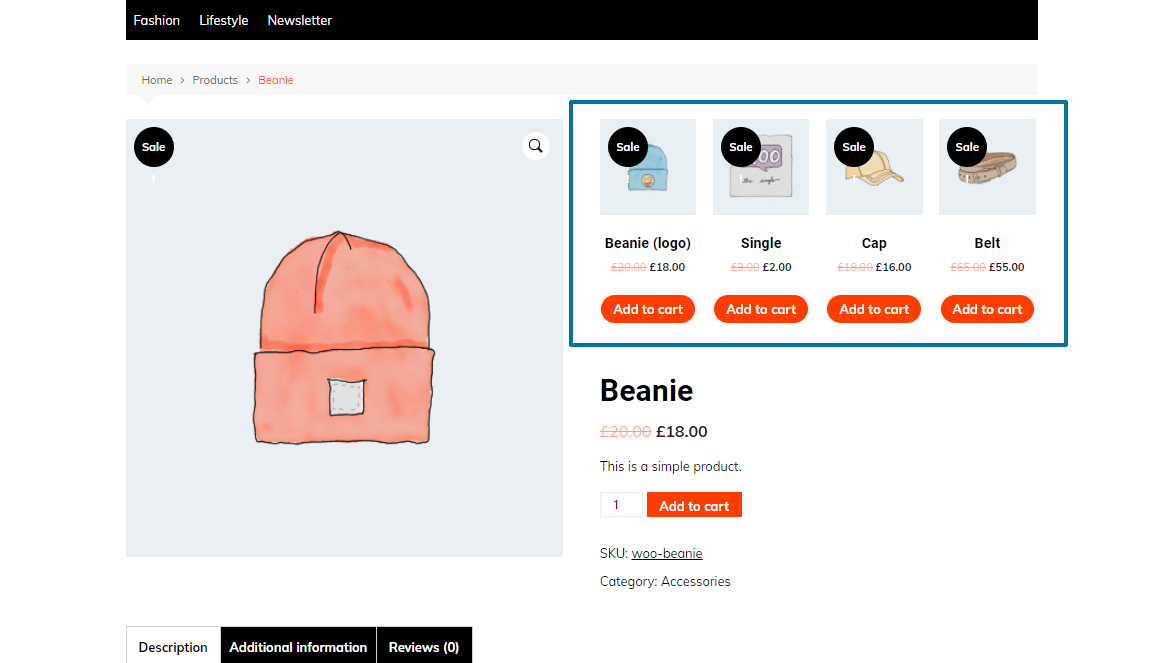
Embedding and targeting ads on WooCommerce product pages
As we saw in the last example, the Custom Position Placement can also insert ads on product pages. Besides this placement, you can select a few more placements to show ads on these pages, for example:
- Above Headline (to embed a banner on a single product page above the H1)
- Before Content (integrating a banner on single product pages before the description)
- Content (include a banner on single product pages within the description)
- After Content (show a banner on single product pages at the end of the description)
By adding display conditions, you can precisely target adverts that you insert in pages of individual products. Furthermore, you will increase your visitors’ conversion by an optimized targeting.
For this purpose, Advanced Ads offers three custom WooCommerce display conditions:
- Product categories (show/hide ads on product pages of specific categories)
- Product tags (show/hide ads on product pages with particular tags)
- Product shipping classes (show/hide ads on product pages of certain shipping zones)
What else you should know about WooCommerce ads
The WooCommerce shop page that displays all of your products might be listed among your static pages. But it is technically working as a product archive page.
This means that the General display condition responds to the Archive Pages condition, not the Singular Pages condition. For the Post Type condition, it responds to the Products post type, not to Pages.
If your WooCommerce inventory includes products from external websites, and you, as an affiliate, earn money from their sales, you can track impressions and clicks on these products. To do this, create them as an ad unit as described above.