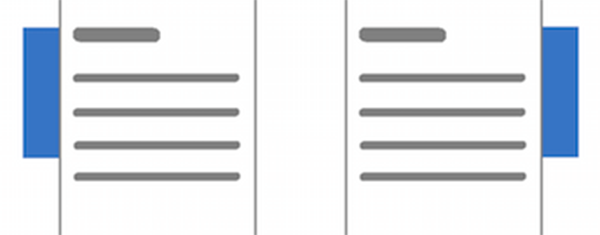
A site branding ad setup is a very lucrative integration of ads with a strong visual impact on your website’s top area. It consists of three sections: a left and a right bar, and a top banner, altogether wrapping directly around your content area like a claw arm.
The term “site branding” comes from the fact that this integration of ads is often booked by a single advertiser to brand the website with its appearance. This ad format is also known as “full branding”. Magazine websites and newspapers often use this setup.
Since the banners at the sides and top stick directly together, graphics and texts can spread across the three banners and appear as one unit. Therefore, these ad spaces are popular and profitable.
The advantages of site branding advertising
- strong visual impact
- ads stick out of the content width
- can’t be overlooked
- profitable and popular ad space
Wrap three ads around the content
With Advanced Ads, you can easily inject all the ad units that belong to a site branding ad setup into your WordPress website.
What you need for a full branding setup:
- Advanced Ads
- Sticky Ads add-on
- optionally Advanced Ads Pro
The Sticky Ads add-on offers dedicated placements that attach to the left and right corner of the content area.
Injecting ads into the top area above the navigation bar is not always that easy. Some WordPress themes tend to do their own magic there. With Advanced Ads you can use the Custom Position placement and the Manual Placement to display ads in the header area. Take a look at this tutorial about several methods to insert ads into your website’s header.
So, finally, your site branding ad setup will consist of the following elements:
- one ad unit in a Left Sidebar placement
- a second ad unit in a Right Sidebar placement
- a top banner ad unit displayed through a Custom Position, Manual or other placement
Most likely, you will build up a full branding setup with image ads. Ensure that the top banner has the width of your content area so that it fits together seamlessly with the sidebar ads. I recommend designing this ad setup in advance and then splitting the image into the left, top, and right parts.
What else you need to know
With additional Display or Visitor Conditions, you can fine-tune this setup. For example, you can ensure that this site branding ads campaign only appears on desktop browsers or only on the home page, but not on individual post pages.
If you need to control multiple site branding ad campaigns simultaneously, take a look at our tutorial about how to create roadblock ads.
You can also play around with the placement settings and, e.g., enable the fix to window position for the ads on the left and right side. This feature fixes the left and right ads anchor to the top of your browser window even when the visitors scroll down.
Do you have further ideas or questions regarding elaborate ad setups? Feel free to contact our customer support here.


