We occasionally receive requests for Page Peel ads, a feature that allows you to tease an advertisement at the top left or right corner of your website. The whole ad is revealed when a user hovers over the little corner at the top.
Even though the idea of peel banners – also known as a corner peel effect – isn’t new, I still find that they grab my attention.
Years ago, I already started to develop a page peel effect. Then, something else became a higher priority, and this project became stale.
I have now decided to review my code from before, clean it up, and release it as is for free to get more feedback.
Table of Contents
Page peel ad features
OUr page peel plugin comes with a new “Page Peel” placement that has the following options:
- choose any of the four corners of a website to place the corner peel effect
- select an existing image ad to show in the corner
- define the size of the collapsed and the opened ad

In addition to that, you can use other Advanced Ads features in combination with the page peel effect:
- track impressions and clicks (Tracking add-on)
- show the ad only on desktops by using the “Device” visitor condition (Advanced Ads)
- show the ad only on larger screens by using the Browser Width visitor condition (Advanced Ads Pro)
- set frequency capping and limit how often a user should see the ad by using the “Max Ad Impressions” visitor condition (Advanced Ads Pro)
- hide the ad after the user clicks once on it (Advanced Ads Pro).
How to set up a page peel ad
Install the add-on
Download the free add-on using the button below.
Install this add-on like all other Advanced Ads extensions. See this detailed guide if you have questions about installing and activating add-ons.
Create an image ad
Page peel ads work best with the image ad type. So, the first thing to do is to create a new image ad under Advanced Ads > Ads.
Select an image with the correct size.
To improve the experience, your image could have a small call to action in the corner that is later visible in the frontend.
Select the page peel effect
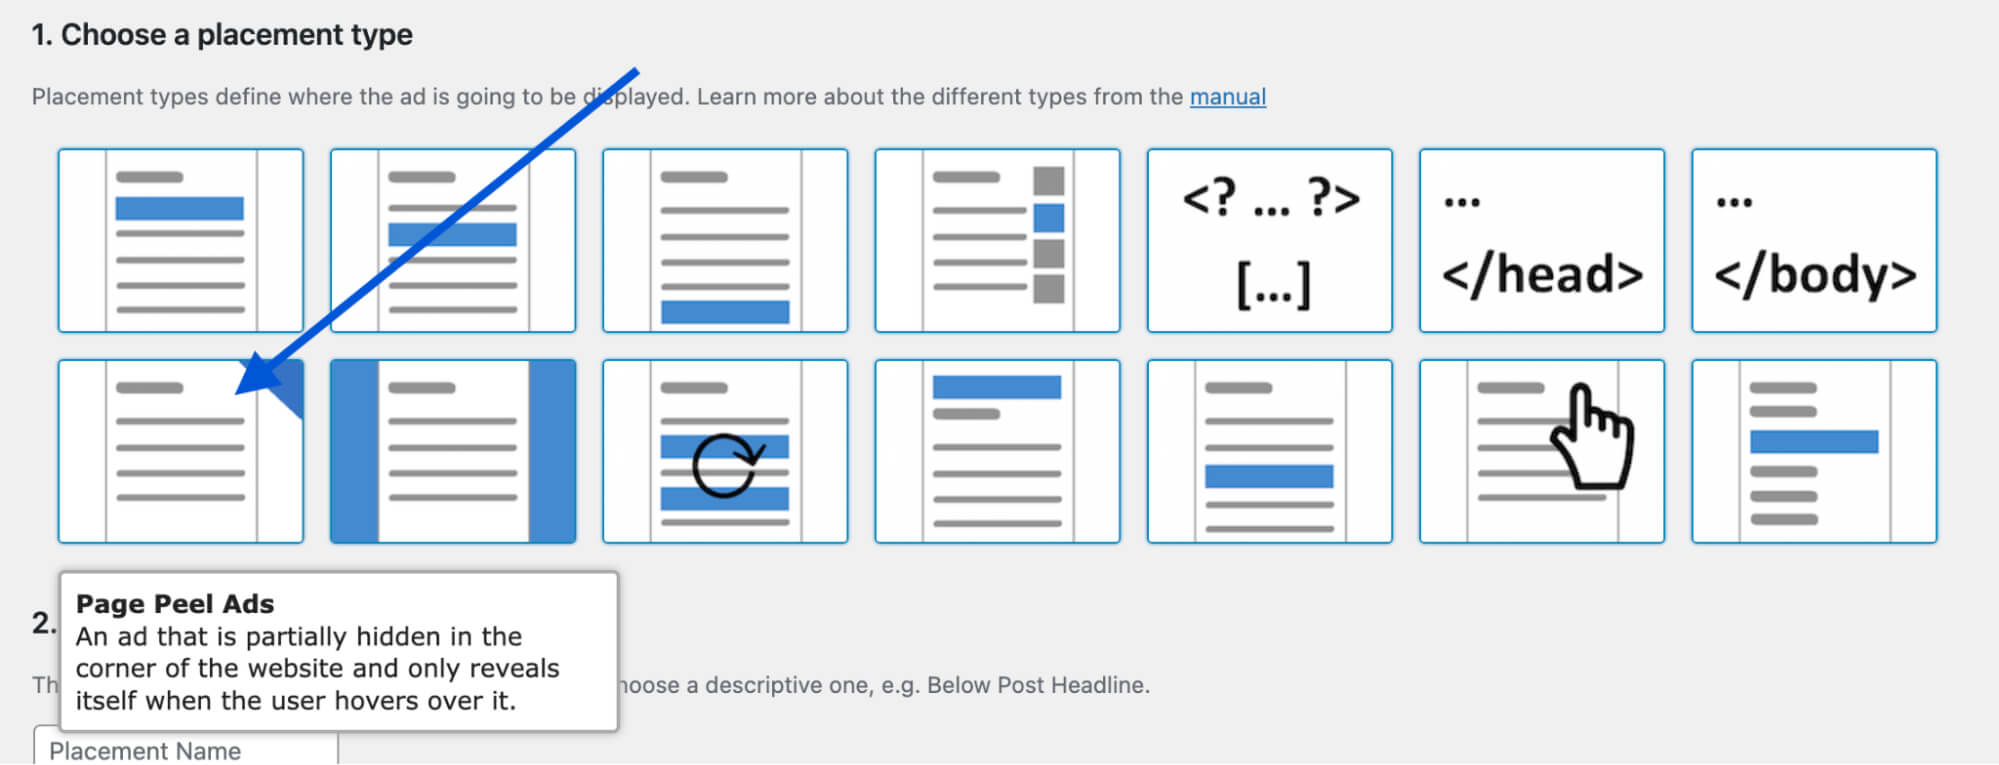
The effect comes with a new placement type called Page Peel.
Go to Advanced Ads > Placements to create a new placement. Select the Page Peel Ads placement type from the list.
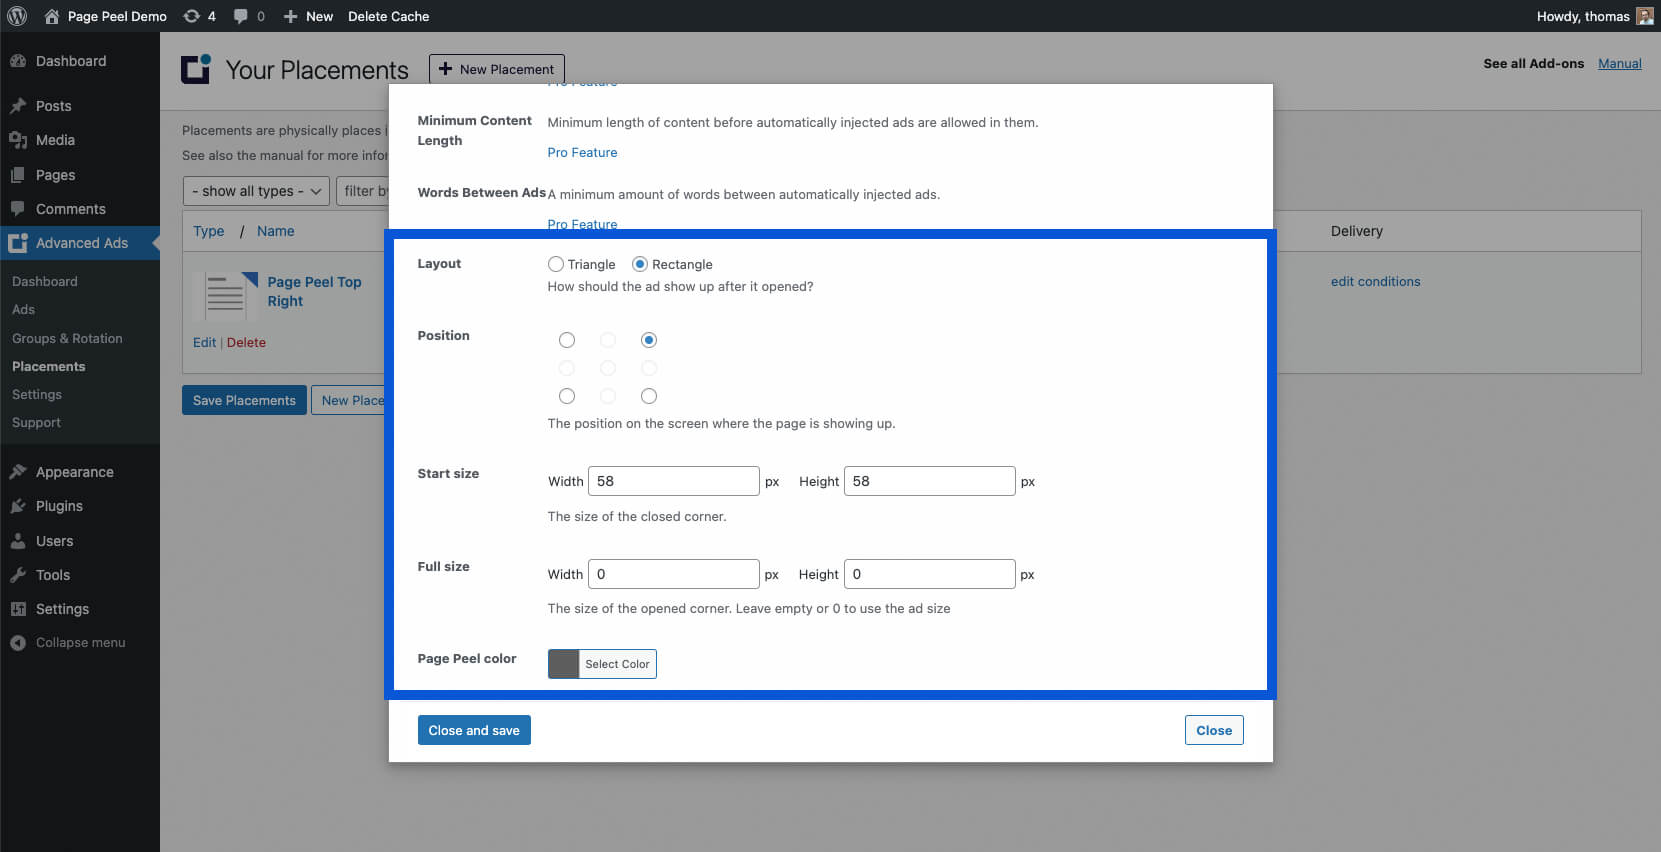
Now, find the page peel ad options under the “show all options” link.

You can now customize the effect by choosing the layout, position, and size of the corner peel.
Target the page peel ad
The page peel ad can be combined with Display or Visitor Conditions.
I’d suggest enabling this ad unit only for visitors on larger devices. Use the Device visitor condition and select “desktop” on the ad or placement level, or apply the Browser Width condition to specify the size of the browser window that should see it.
You can also limit the number of impressions of the corner peel ad per visitor using the Max Ad Impressions condition that comes with Advanced Ads Pro. The same add-on also provides the Max Ad Clicks option that hides the ads from users who have already clicked on them.
Limitations
- While you can currently select any type of ad, the Page Peel placement only works reliably with images.
- Never use this position for Google AdSense ads since it is not allowed.
- Ad Groups don’t work, yet.
What next?
I intend to add this feature to Advanced Ads Pro after I feel that we meet your basic needs regarding usability and layout options.
To receive more feedback, we decided to publish the feature as a free add-on for now. Please let me know if you have any suggestions to improve it.
FAQ
A page peel ad is an online advertising format that imitates the effect of peeling back a corner of a website to reveal an underlying ad. Typically displayed in the top corner of a webpage, it catches the user’s attention without obstructing the main content.
Download, install, and activate the Advanced Ads Page Peel plugin. Create a new placement and choose the peel placement. Assign an image ad to this placement and save your settings.
Google AdSense does not permit embedding AdSense ads with any additional effects. Showing AdSense ads in a page peel would violate the AdSense placement policy. So, you should not utilize them in that manner.