This tutorial will show you how you can create and display your first ad on your website.
Table of Contents
Getting started
Ads are the content you want to display, such as a banner ad, a text link, or a JavaScript-based ad code, e.g., from the Amazon Affiliate Program or Google AdSense.
Ad groups are handy if you want to display multiple ads at the same spot. You can rotate them for each page impression or show numerous ads simultaneously, e.g., in an ad grid.
Since you might not need ad groups when getting started, we focus on single ad units in this tutorial.

Creating an ad unit
To create a new ad unit, navigate to Dashboard > Advanced Ads > Ads and click on “New Ad”. You will see the ad edit view afterward.
Start with defining a title for your ad unit. We recommend using descriptive titles that make it easy for you to identify the ad later, for example, “Campaign A | Leaderboard | Header”.
Then, choose the appropriate ad type, e.g., an image ad, a rich content ad, or an AdSense ad.
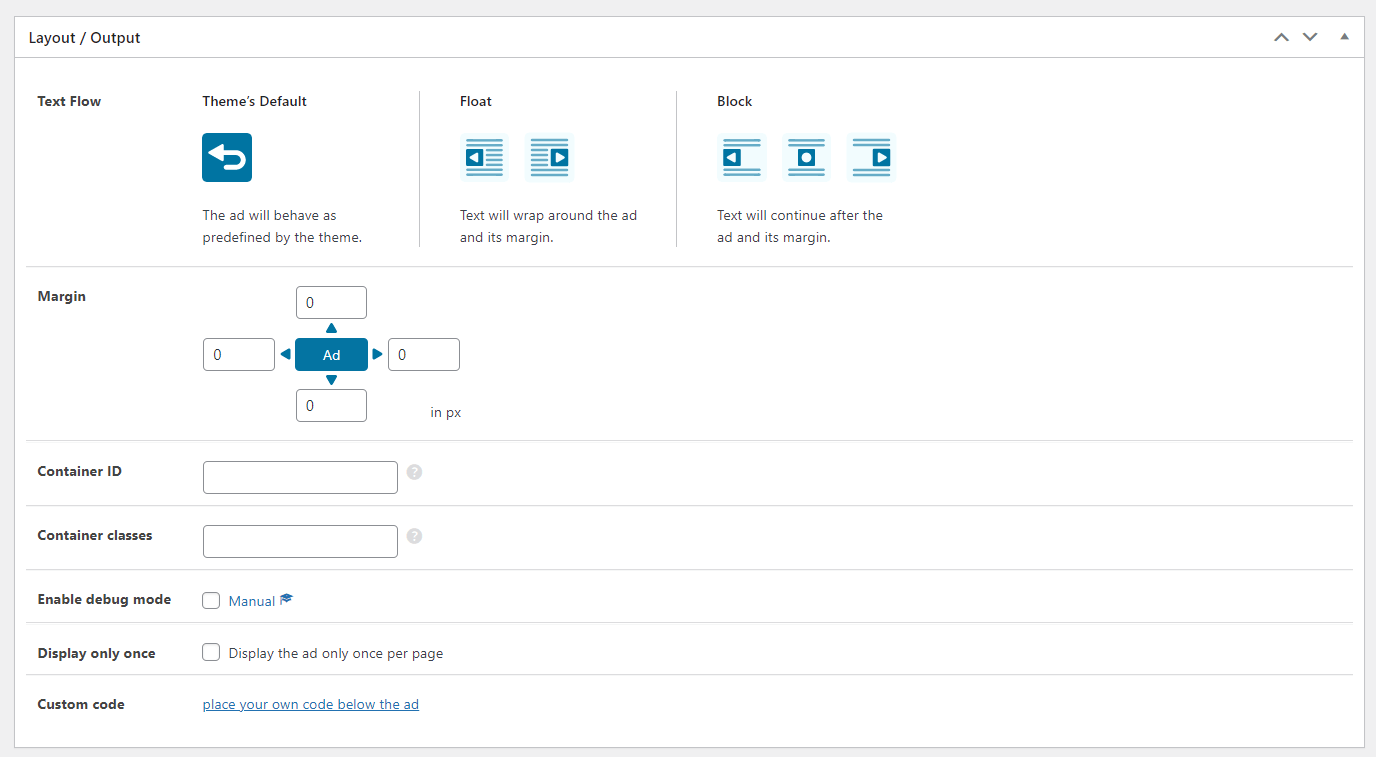
Using the wizard to create the ad, you will be guided through the layout options and the section with display and visitor conditions afterward. But you will find these options also by scrolling down the ad edit page if you stop the wizard.
Display Conditions allow you to target your ad to specific content and to show the ad, e.g., only on certain pages, post types, categories, and more. Don’t set anything here if you want the ad to show up on every page.
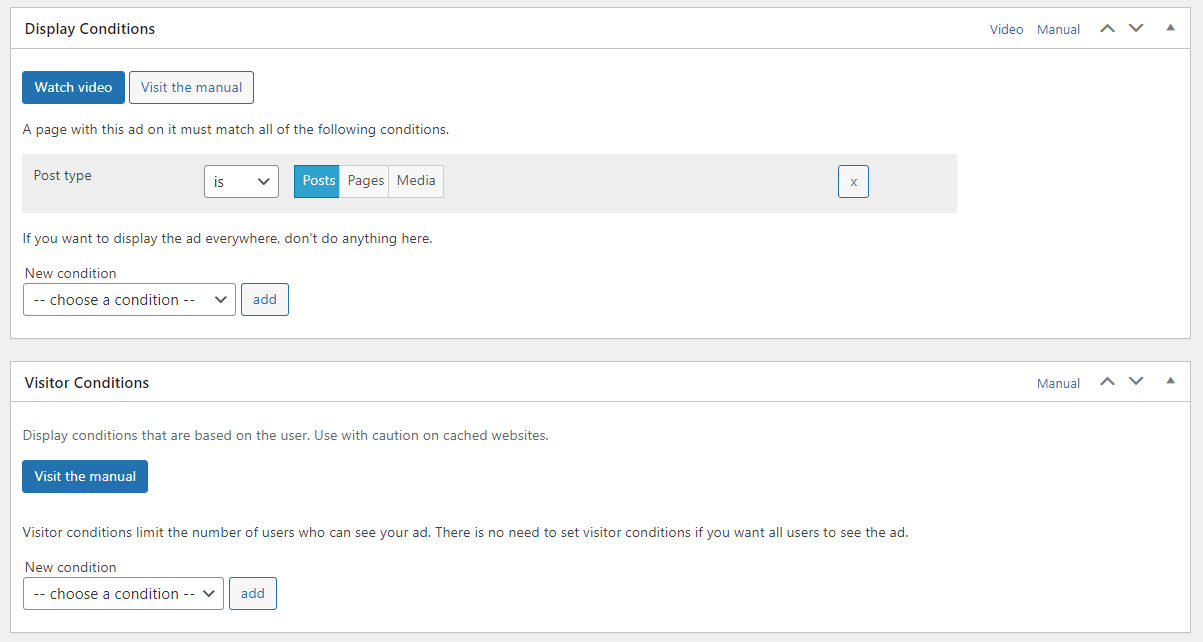
The Visitor Conditions are about properties of your visitors to see or not see ads, like showing an ad only to visitors that use mobile devices. Don’t add visitor conditions if the ad should show up to every visitor.
If all settings are as you wish them to be, publish the ad by clicking the “Publish” button. Of course, you can still make changes to the ad settings after publishing.
Embedding ads into your website
Advanced Ads comes with different ways to include ad units into your website. You can use one of the following methods:
- Auto-injecting them via placements.
- Inserting shortcodes manually
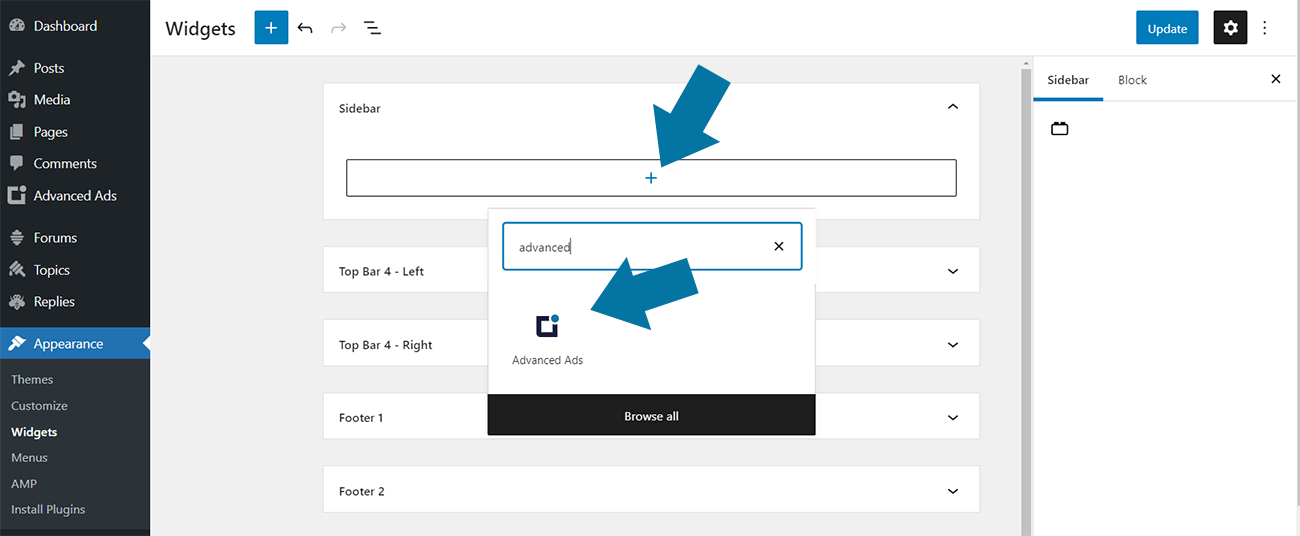
- Embedding ads using the sidebar widget (up to WordPress 5.7) or the Advanced Ads block (since WordPress 5.8).
- Adding a function in your theme template.
Auto-Inject ads via Placements
Placements are a kind of placeholders in your content or theme where you can display an ad or an ad group.
If you use them to embed ads, it is easier to change the ad setup afterward without changing your code or content. That’s why we recommend placements to integrate ads into your website.

Depending on the type, placements also come with powerful features like lazy loading, repeating ad injections, or alternative content for users with an activated ad blocker.
These placements let you inject ads into various positions of your website, for example:
- before and after post content
- within post content based on paragraphs, images, headlines, and more
- into the content middle (Advanced Ads Pro)
- into the header (for “invisible” ad code like header tags)
- between posts on archive pages, e.g., homepage or category pages (Advanced Ads Pro)
- into sticky placements at the page top, bottom, or left and right bars (Sticky Ads)
See all available placements and features in this manual.
Shortcodes
Shortcodes are the easiest method to insert an ad anywhere within a static page or a post.
Advanced Ads provides shortcodes for ads, groups, and placements.
These shortcodes have the following structure:
[[the_ad id="14"]]
[[the_ad_group id="5"]]
[[the_ad_placement id="custom-placement"]]Code language: JSON / JSON with Comments (json)
Just open the post, page, or any other post type with a content field and include the code.
Ad Widgets and the Advanced Ads block
Use the ad widget to display ads in your sidebar or another widget area.
Go to Appearance > Widgets in your WordPress dashboard to find the widget or block called “Advanced Ads”.
Move it into your sidebar and select the ad, group, sidebar widget placement, or manual placement it should display.
PHP functions in your templates
It is also possible to insert Advanced Ads elements directly into your theme’s template files using a PHP function. We recommend embedding manual placements instead of single ad units or ad groups.
Because this way, you can conveniently manage ads from the placement page and don’t have to edit your theme files every time you want to make any changes to these ads.
You can find a more detailed description of this method in this manual.
Importing ad templates
On our ad templates page, you will find several ad setups that you can import into your site with just a few clicks.
These ad templates demonstrate features like ad rotations, ad grids, anchor ads, and many more. They also make your onboarding with Advanced Ads easier because you can immediately see the result on your website.