When you integrate with online services such as Google Search Console, Google Analytics, Google AdSense, Bing Webmaster Tools, Alexa, Pinterest, or Facebook, you are often prompted to add some verification snippets or custom codes to the header or footer sections of your WordPress website.
Unfortunately, WordPress doesn’t provide any options to insert header or footer code out of the box. So you either edit the header.php or footer.php files of your theme manually, or you install a plugin.
However, did you know that with Advanced Ads, you already have a tool that makes it easy to manage your header and footer codes in WordPress? There is no necessity of manually editing your theme files or using another plugin.
Why you should use Advanced Ads for header and footer code injection:
If you already use Advanced Ads, you can set up the header and footer code injections with just a few clicks. Since Advanced Ads provides all the essential tools and some extra beneficial features, it is not necessary to use an additional plugin.
- a lower number of active plugins for less code and better performance
- quick and easy code management
- no worries about lost code snippets after theme updates
- advanced targeting for specific contents and user groups
- error warnings
How to add header and footer codes with Advanced Ads
To add code to the header of your WordPress site, you need at least one ad unit and one placement. Just follow these steps:
- Go to Advanced Ads > Ads > Create New Ad
- Select the ad type plain text and code if it is not already pre-selected, and insert the code from your clipboard
- Give your ad a title, e.g., “header code”
- Publish this ad and create a new placement for it.
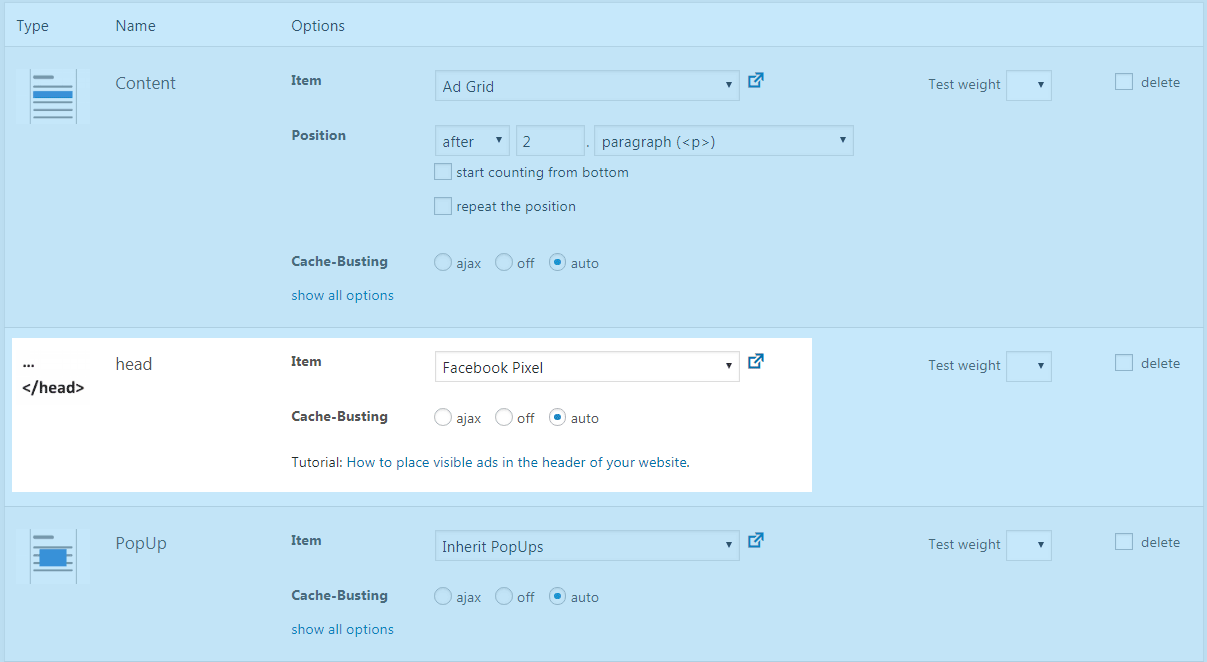
- Go to Advanced Ads > Placements, choose either the header or the footer code placement from the list, and select your ad unit
As a result, the plugin will automatically load the code in the respective placement on your WordPress site now.
Furthermore, if you want to manage multiple codes, you don’t need a unique placement for each of them. I recommend creating a new ad unit for every single snippet instead, adding those ad units to the same group and adjusting the number of visible ads to “all”. Using this configuration, you can always edit or remove single snippets via the group page.
Additional Notes
Advanced Ads provides dedicated WordPress support for Google AdSense. You can manage the integration of this header code comfortably in the AdSense settings: Advanced Ads > Settings > AdSense.
Take advantage of the display conditions. Add some rules if you don’t want to include the footer or header codes in all pages of your website. Add visitor conditions to load those snippets for specific user groups, for example, if this header code is an anchor ad unit for mobile devices only.
Activate Cache Busting if you are using any caching on your site. Purge the cache after saving your changes to ensure that your website’s header and footer codes appear reliably.
Don’t worry if you accidentally deactivated the plugin. Advanced Ads stores the code safely in your WordPress database. As long as you don’t enable the checkbox “Delete data on uninstall” (Advanced Ads > Settings), your header codes will start appearing again after reactivating the plugin.